Plant Haven Renovation Progress: Part 1
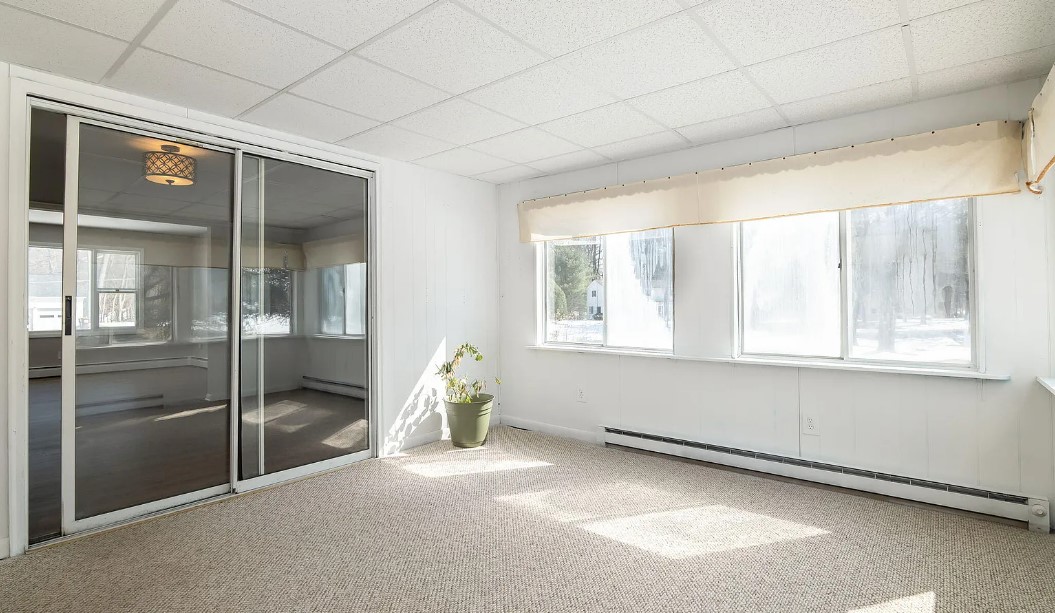
If you’ve been following us on Instagram, you’re aware that we’re diving into our next big project: the Plant Haven Renovation of our three-season room. This space has incredible potential, but it needs a lot of love and care. Last summer, we tackled the support structure beneath the room, ensuring a solid foundation for the renovations ahead. Now, it’s time to focus on the room itself.
Here’s what we’re up against:
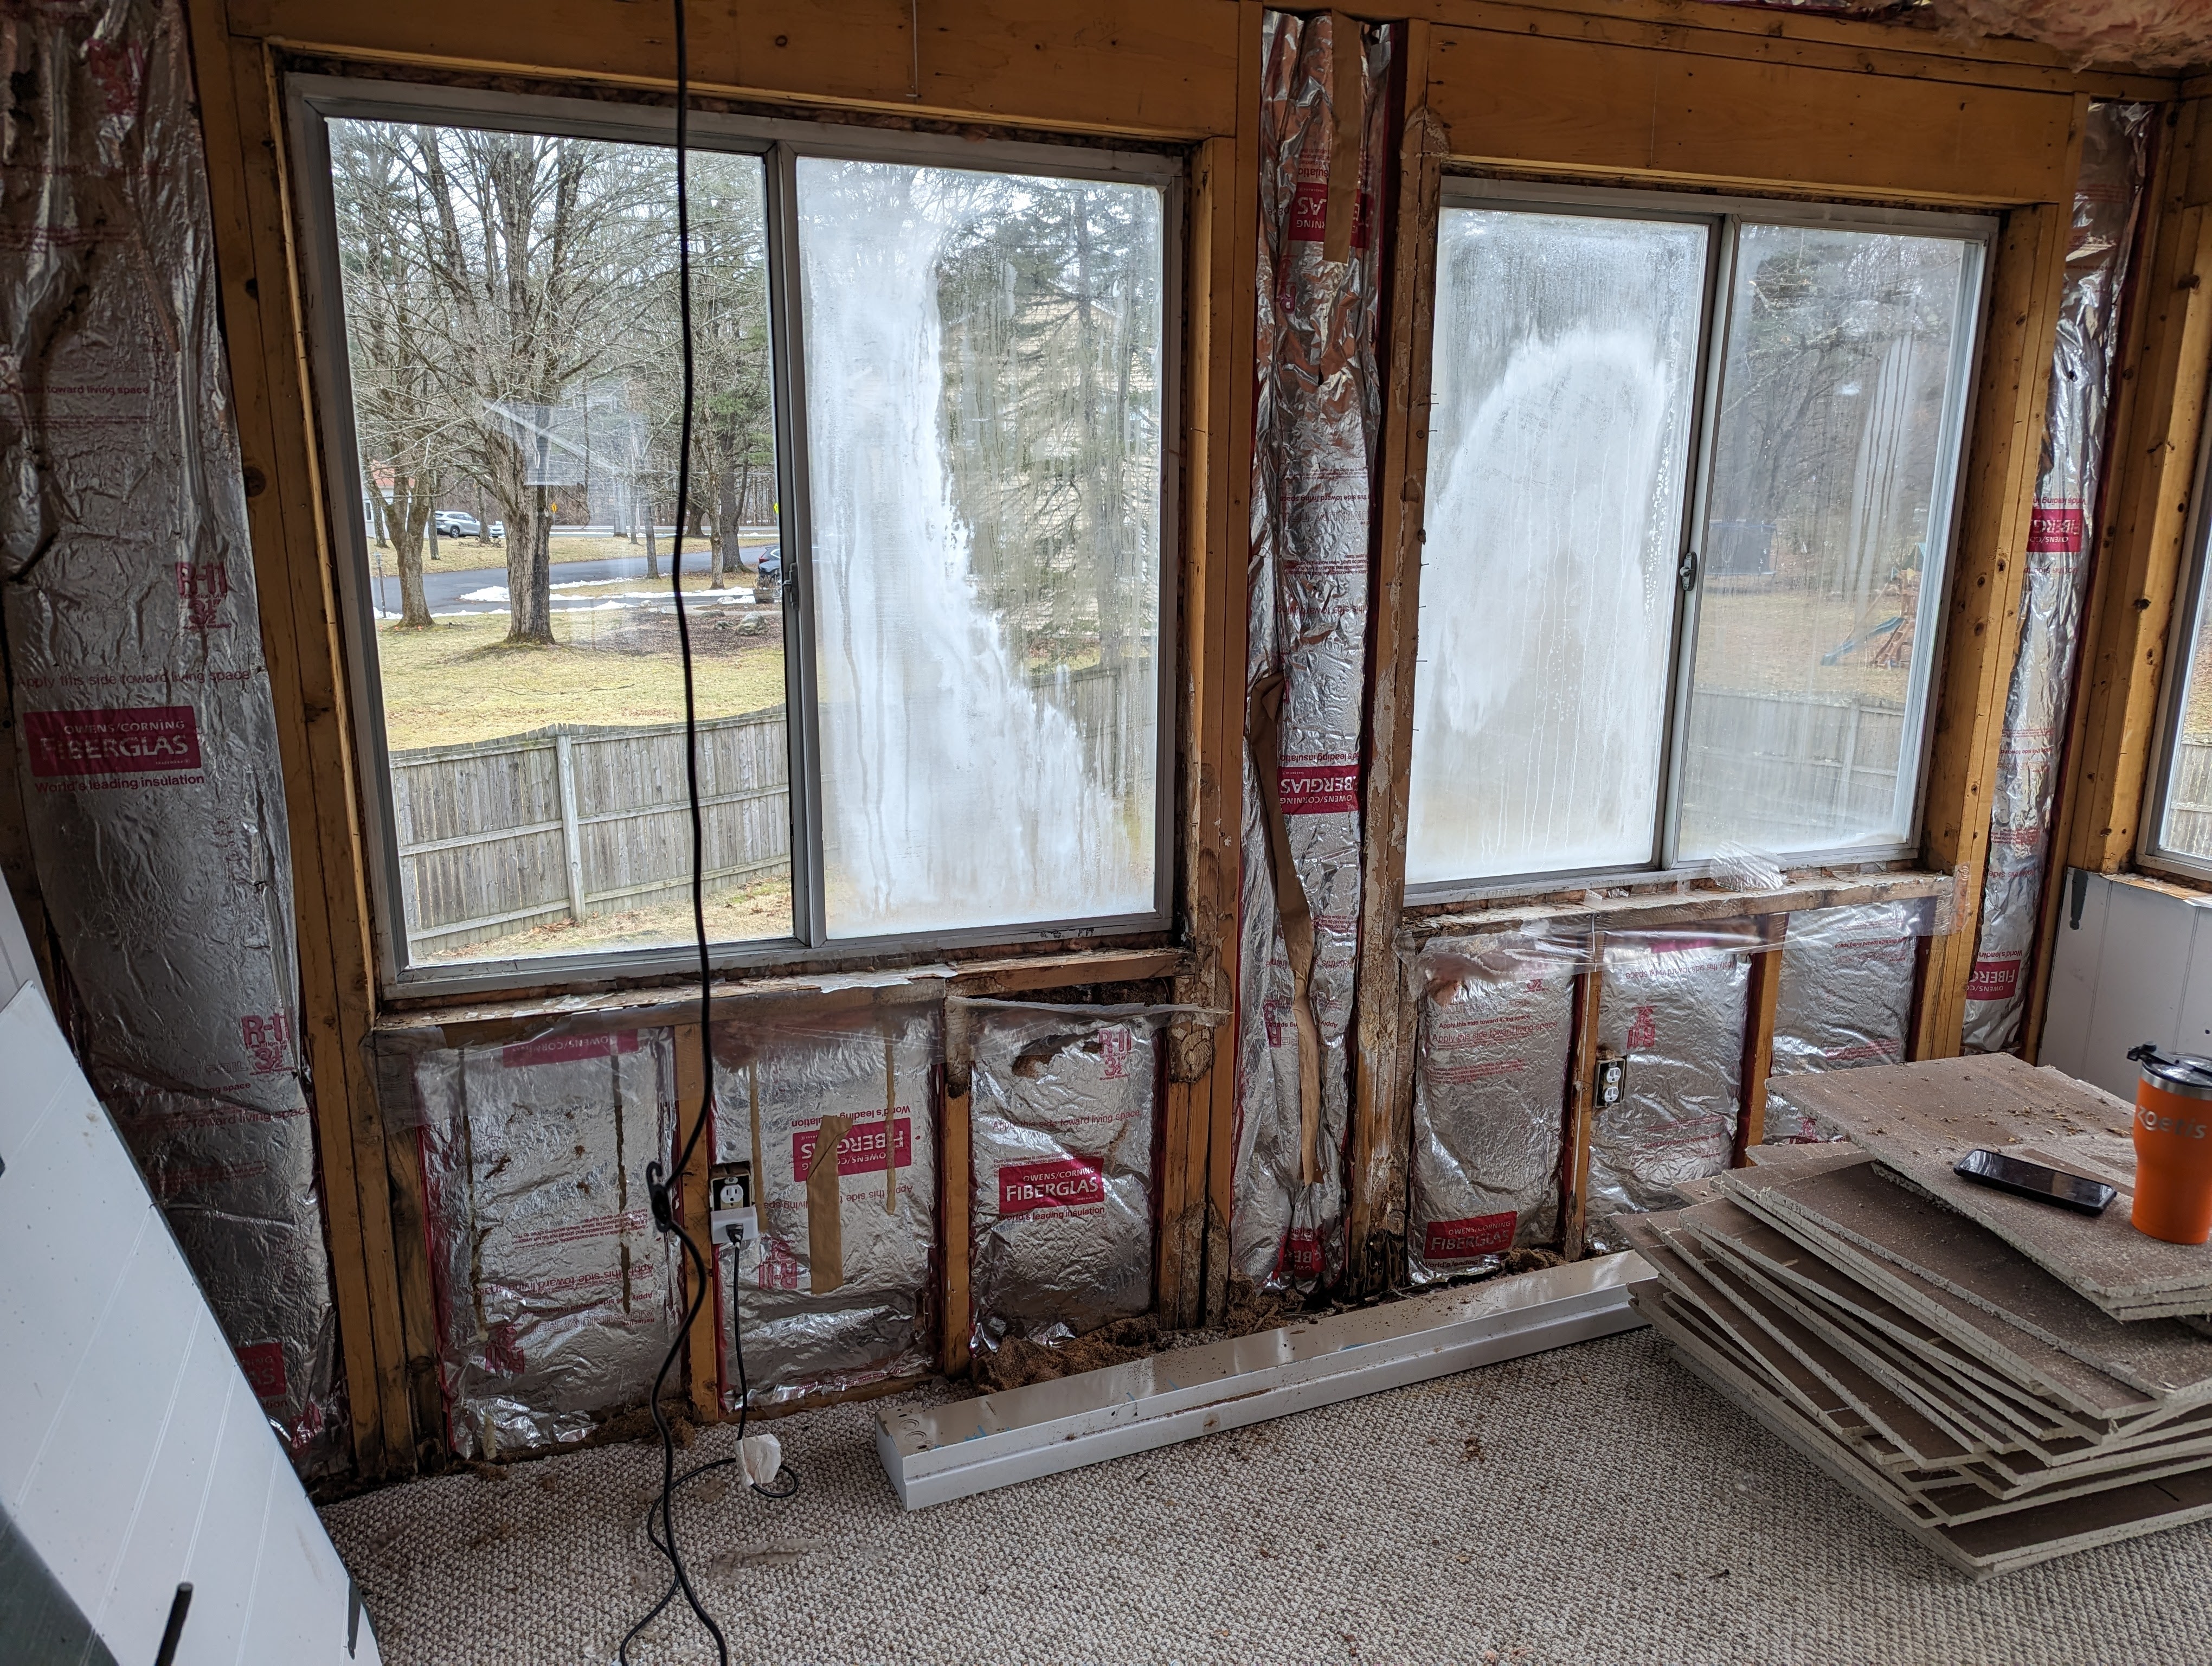
- Windows: The room features six large 48×48 windows, but they’re quite drafty and in need of updating.
- Heating: Unlike the rest of our home, this room relies on electric baseboard heating since the boiler heat doesn’t extend here.
- Flooring: The current flooring is a cheap carpet that we plan to replace with something more durable and aesthetically pleasing.
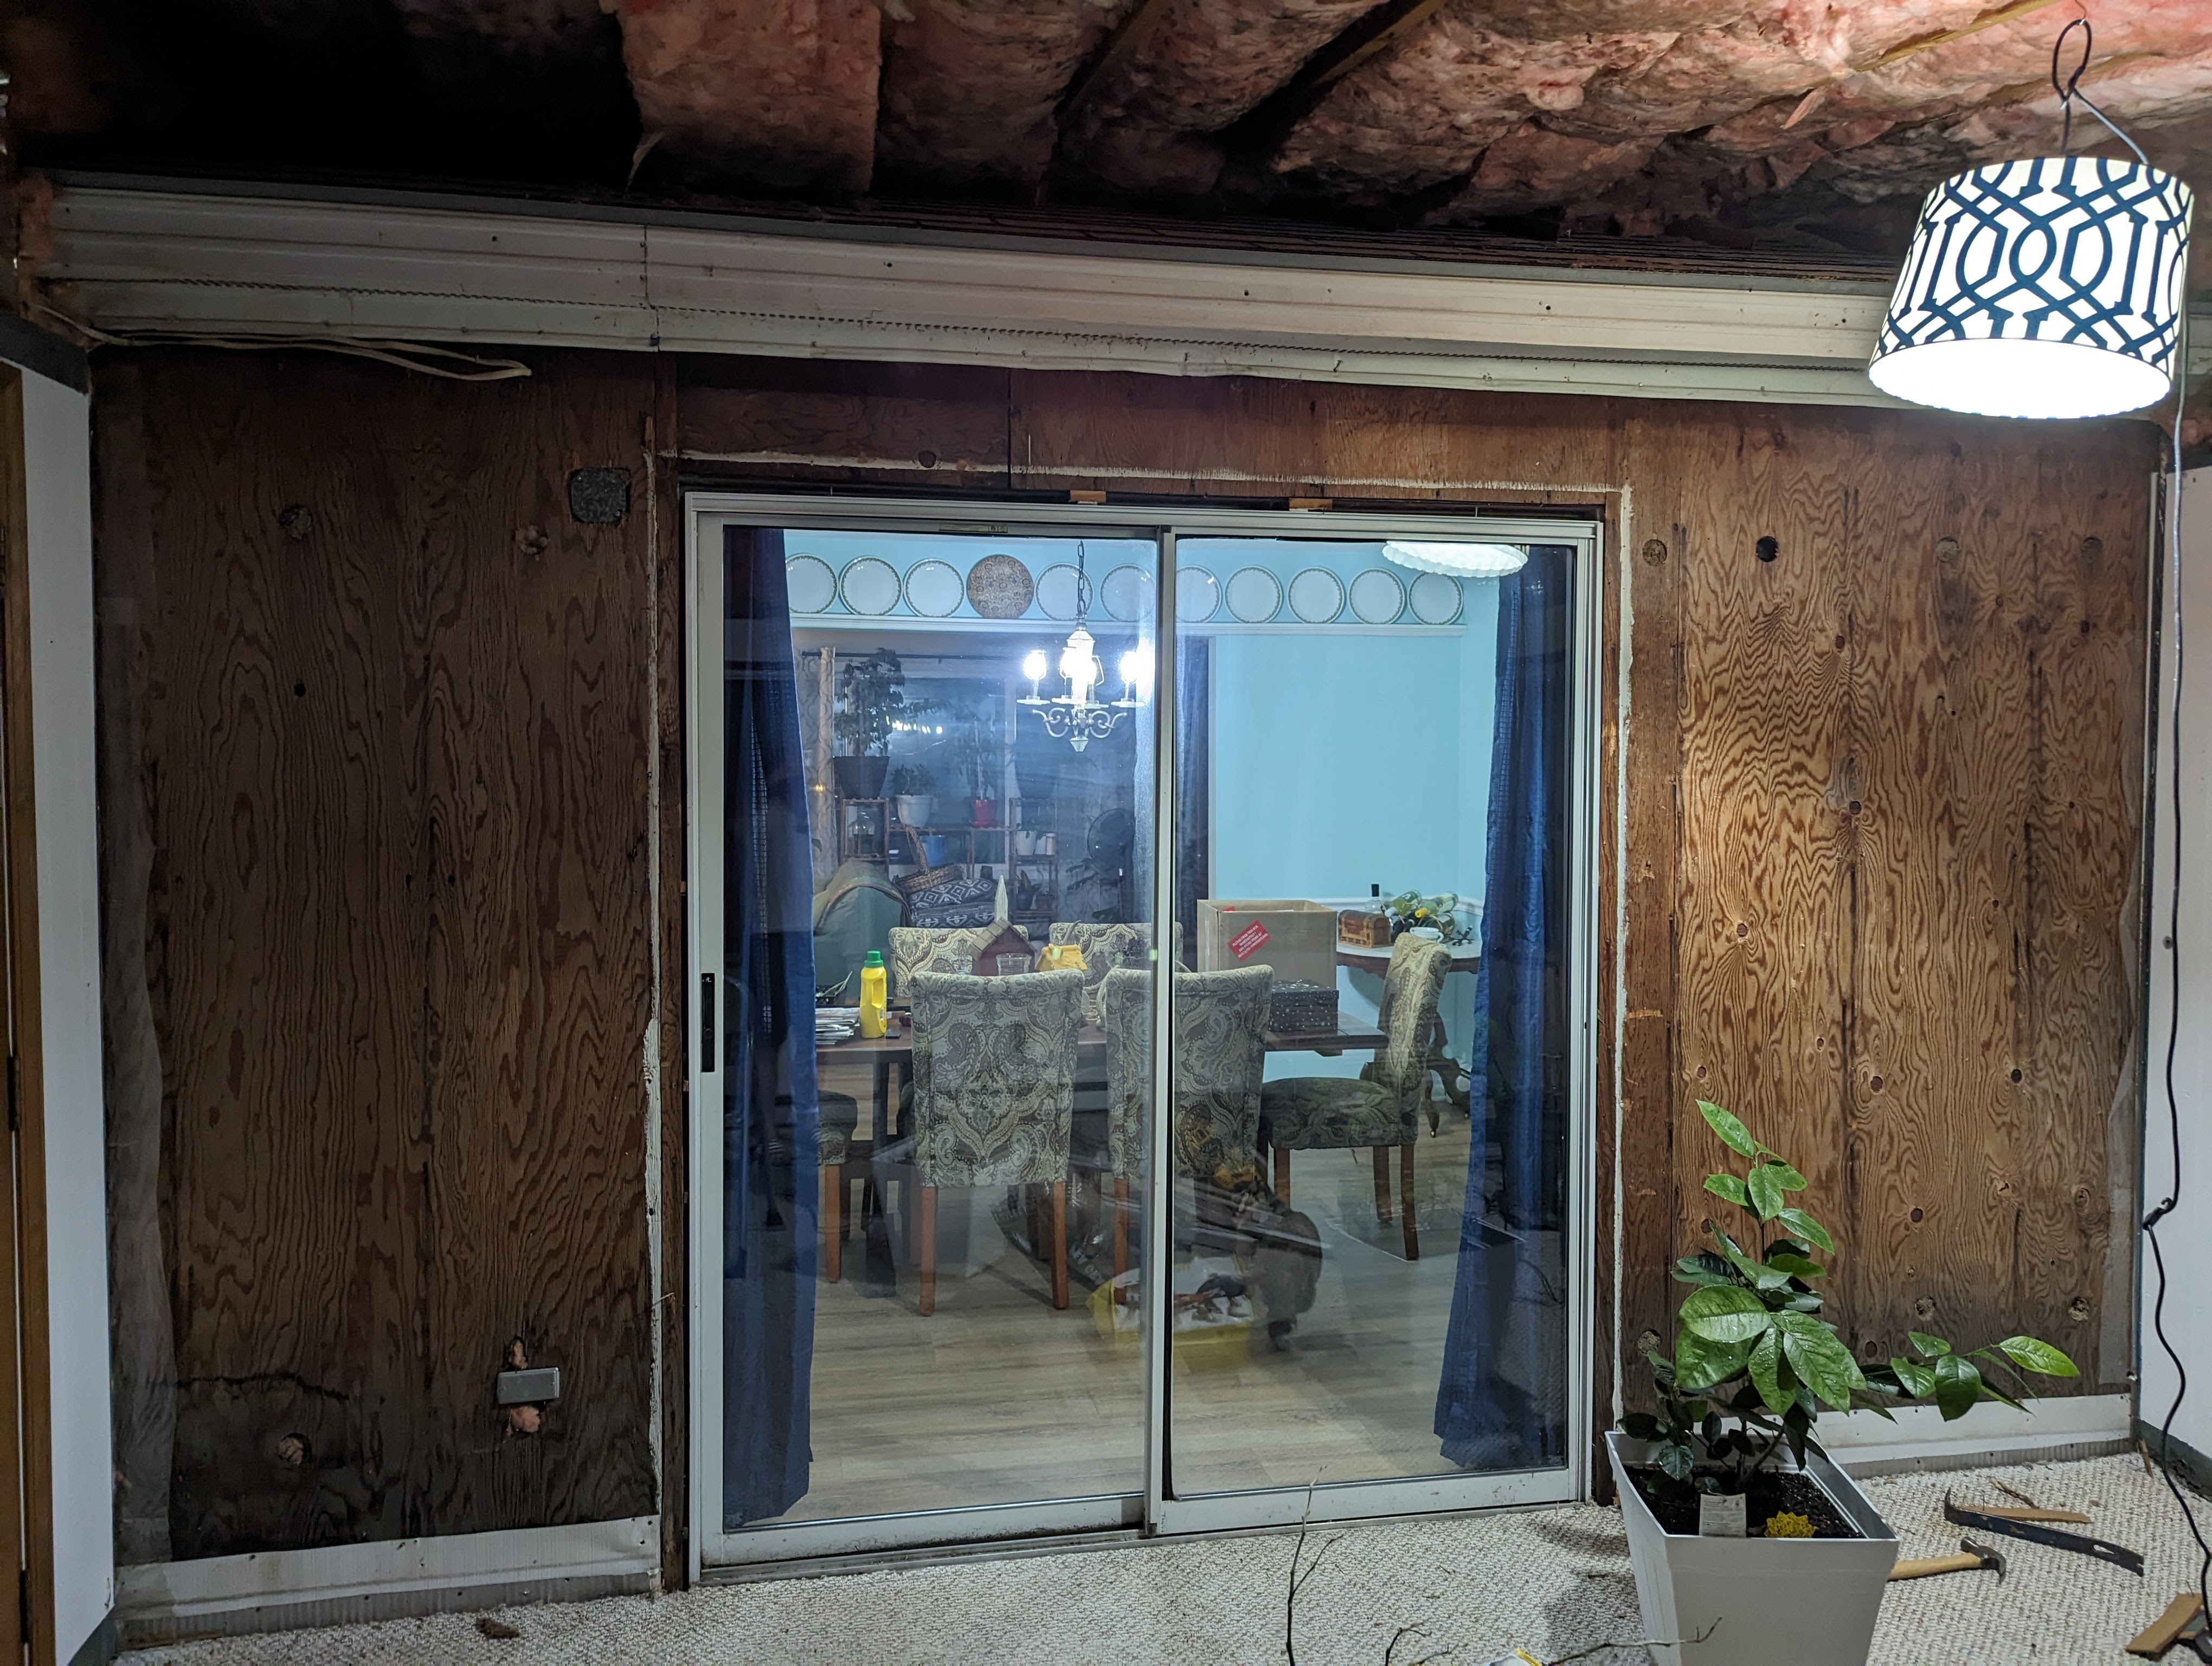
- Walls and Ceiling: The walls are paneled, and the ceiling is a drop ceiling, both of which are outdated and begging for a refresh.
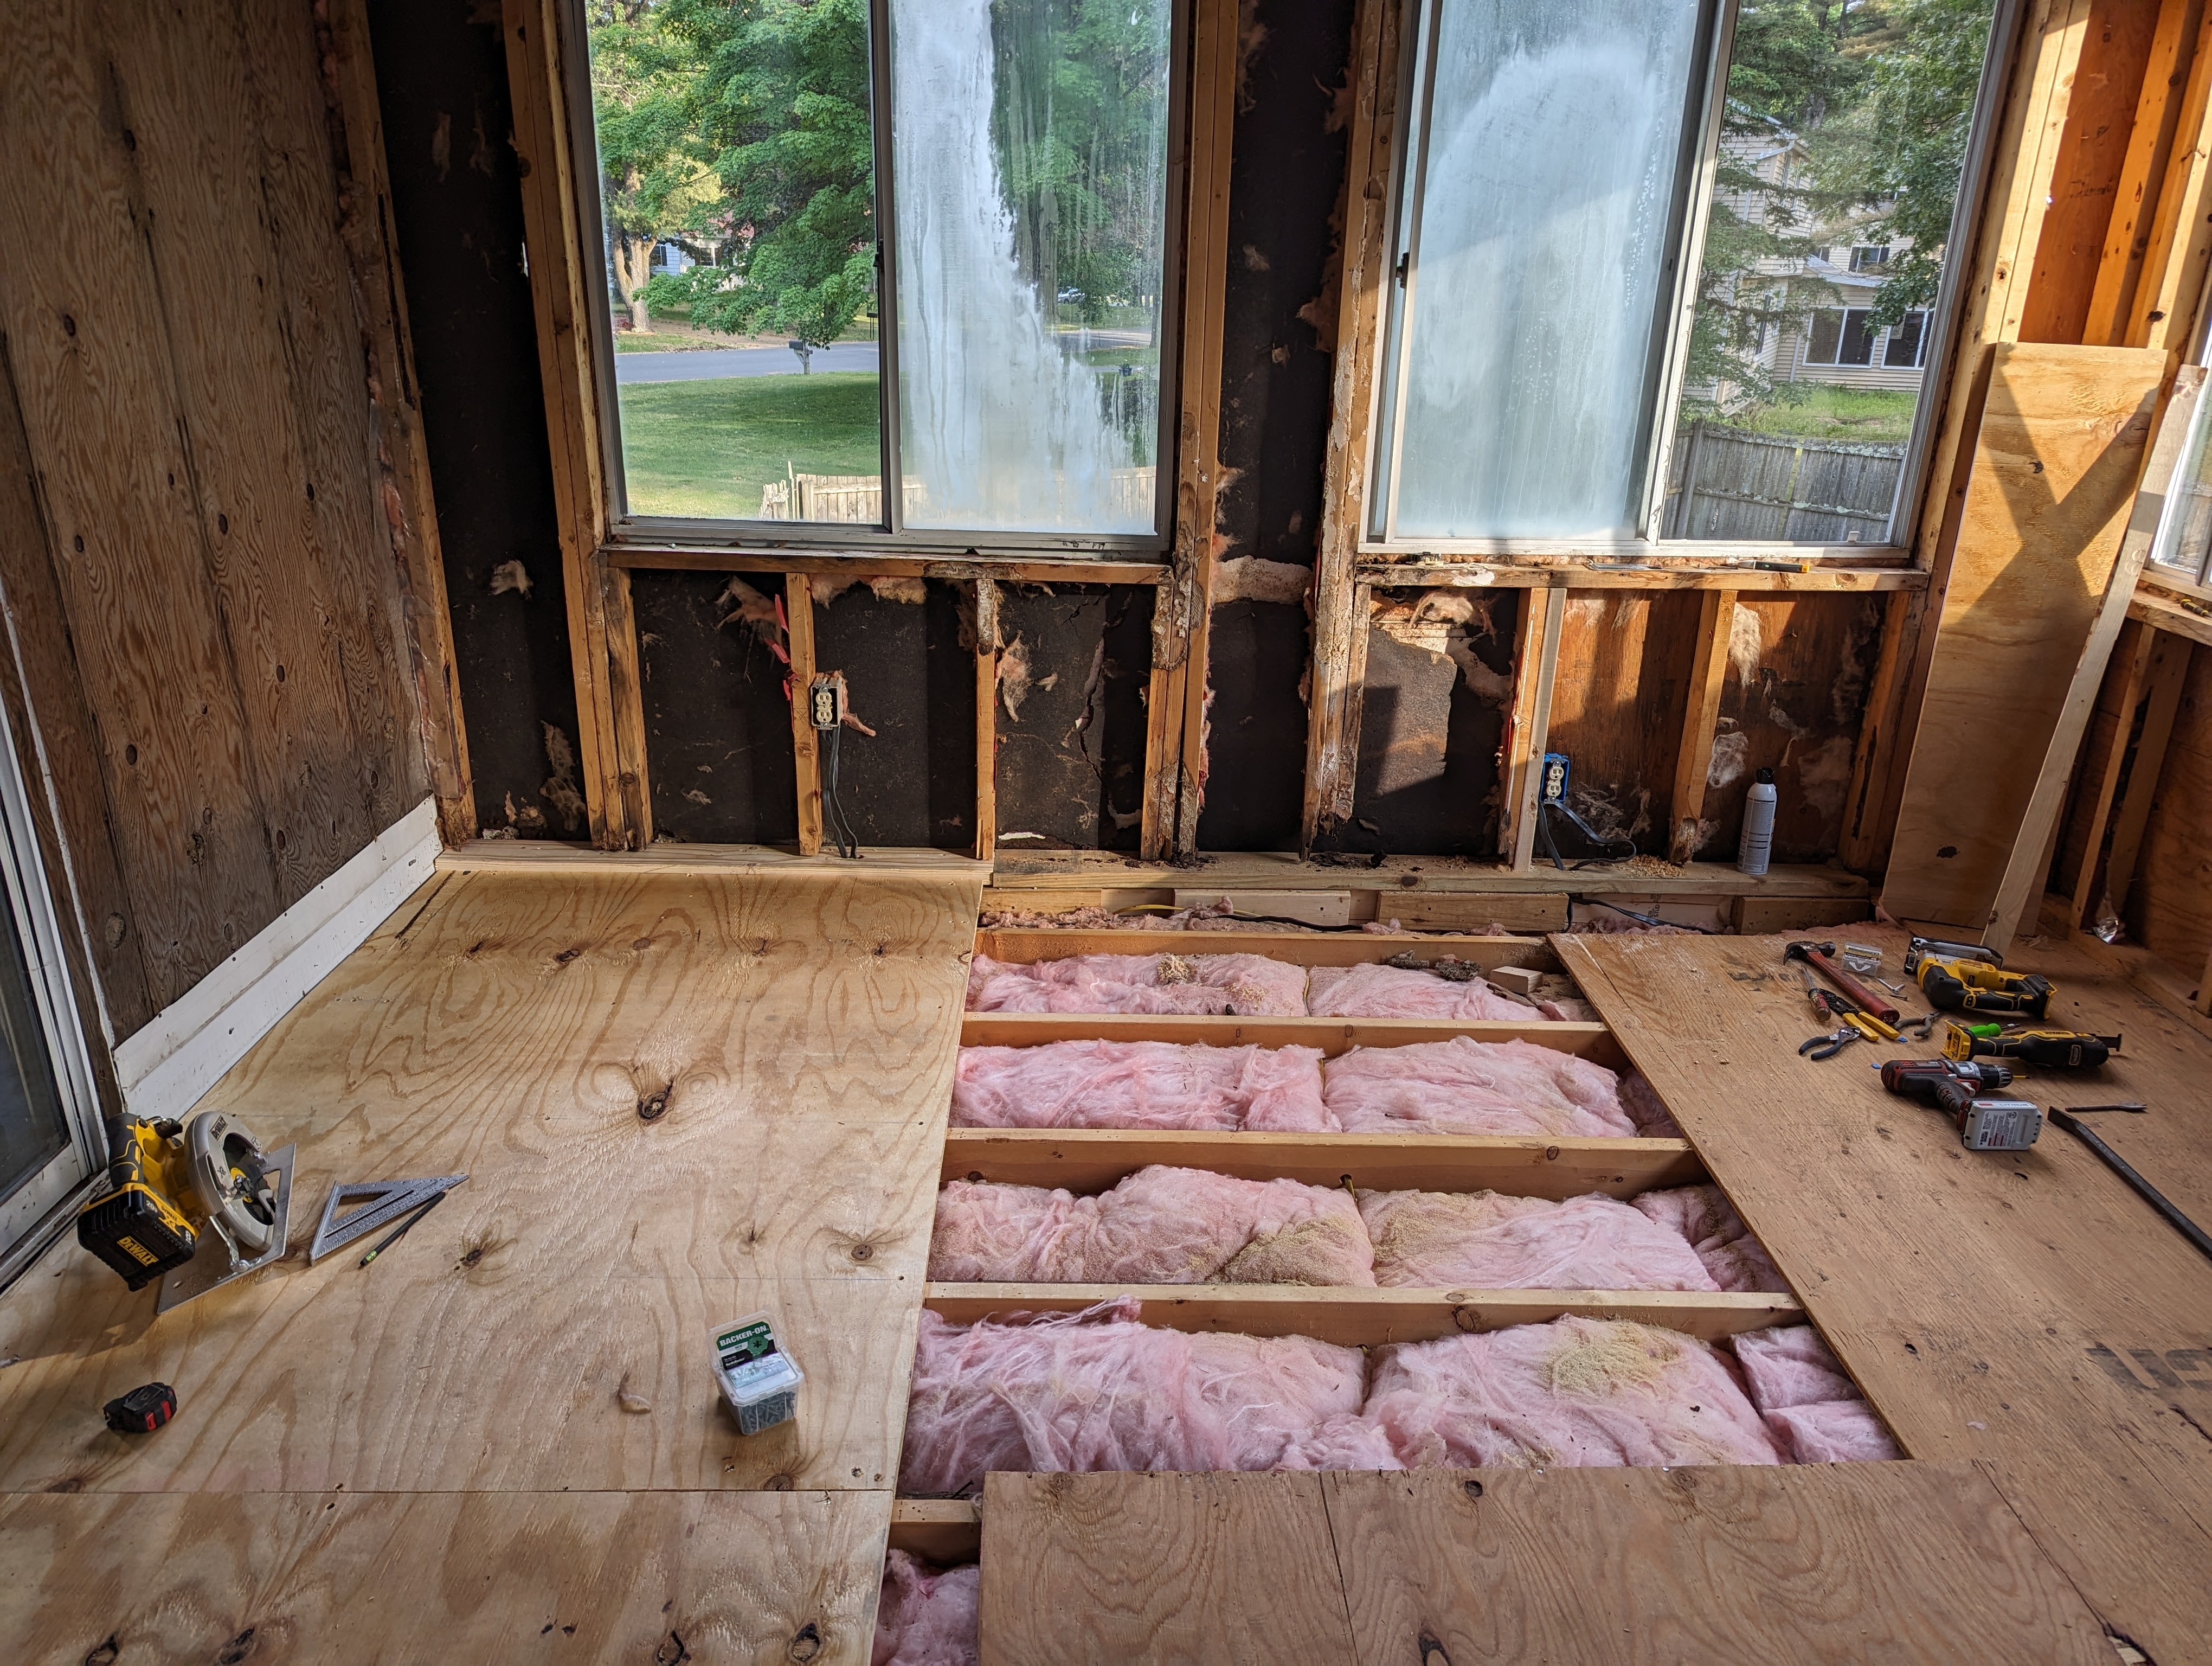
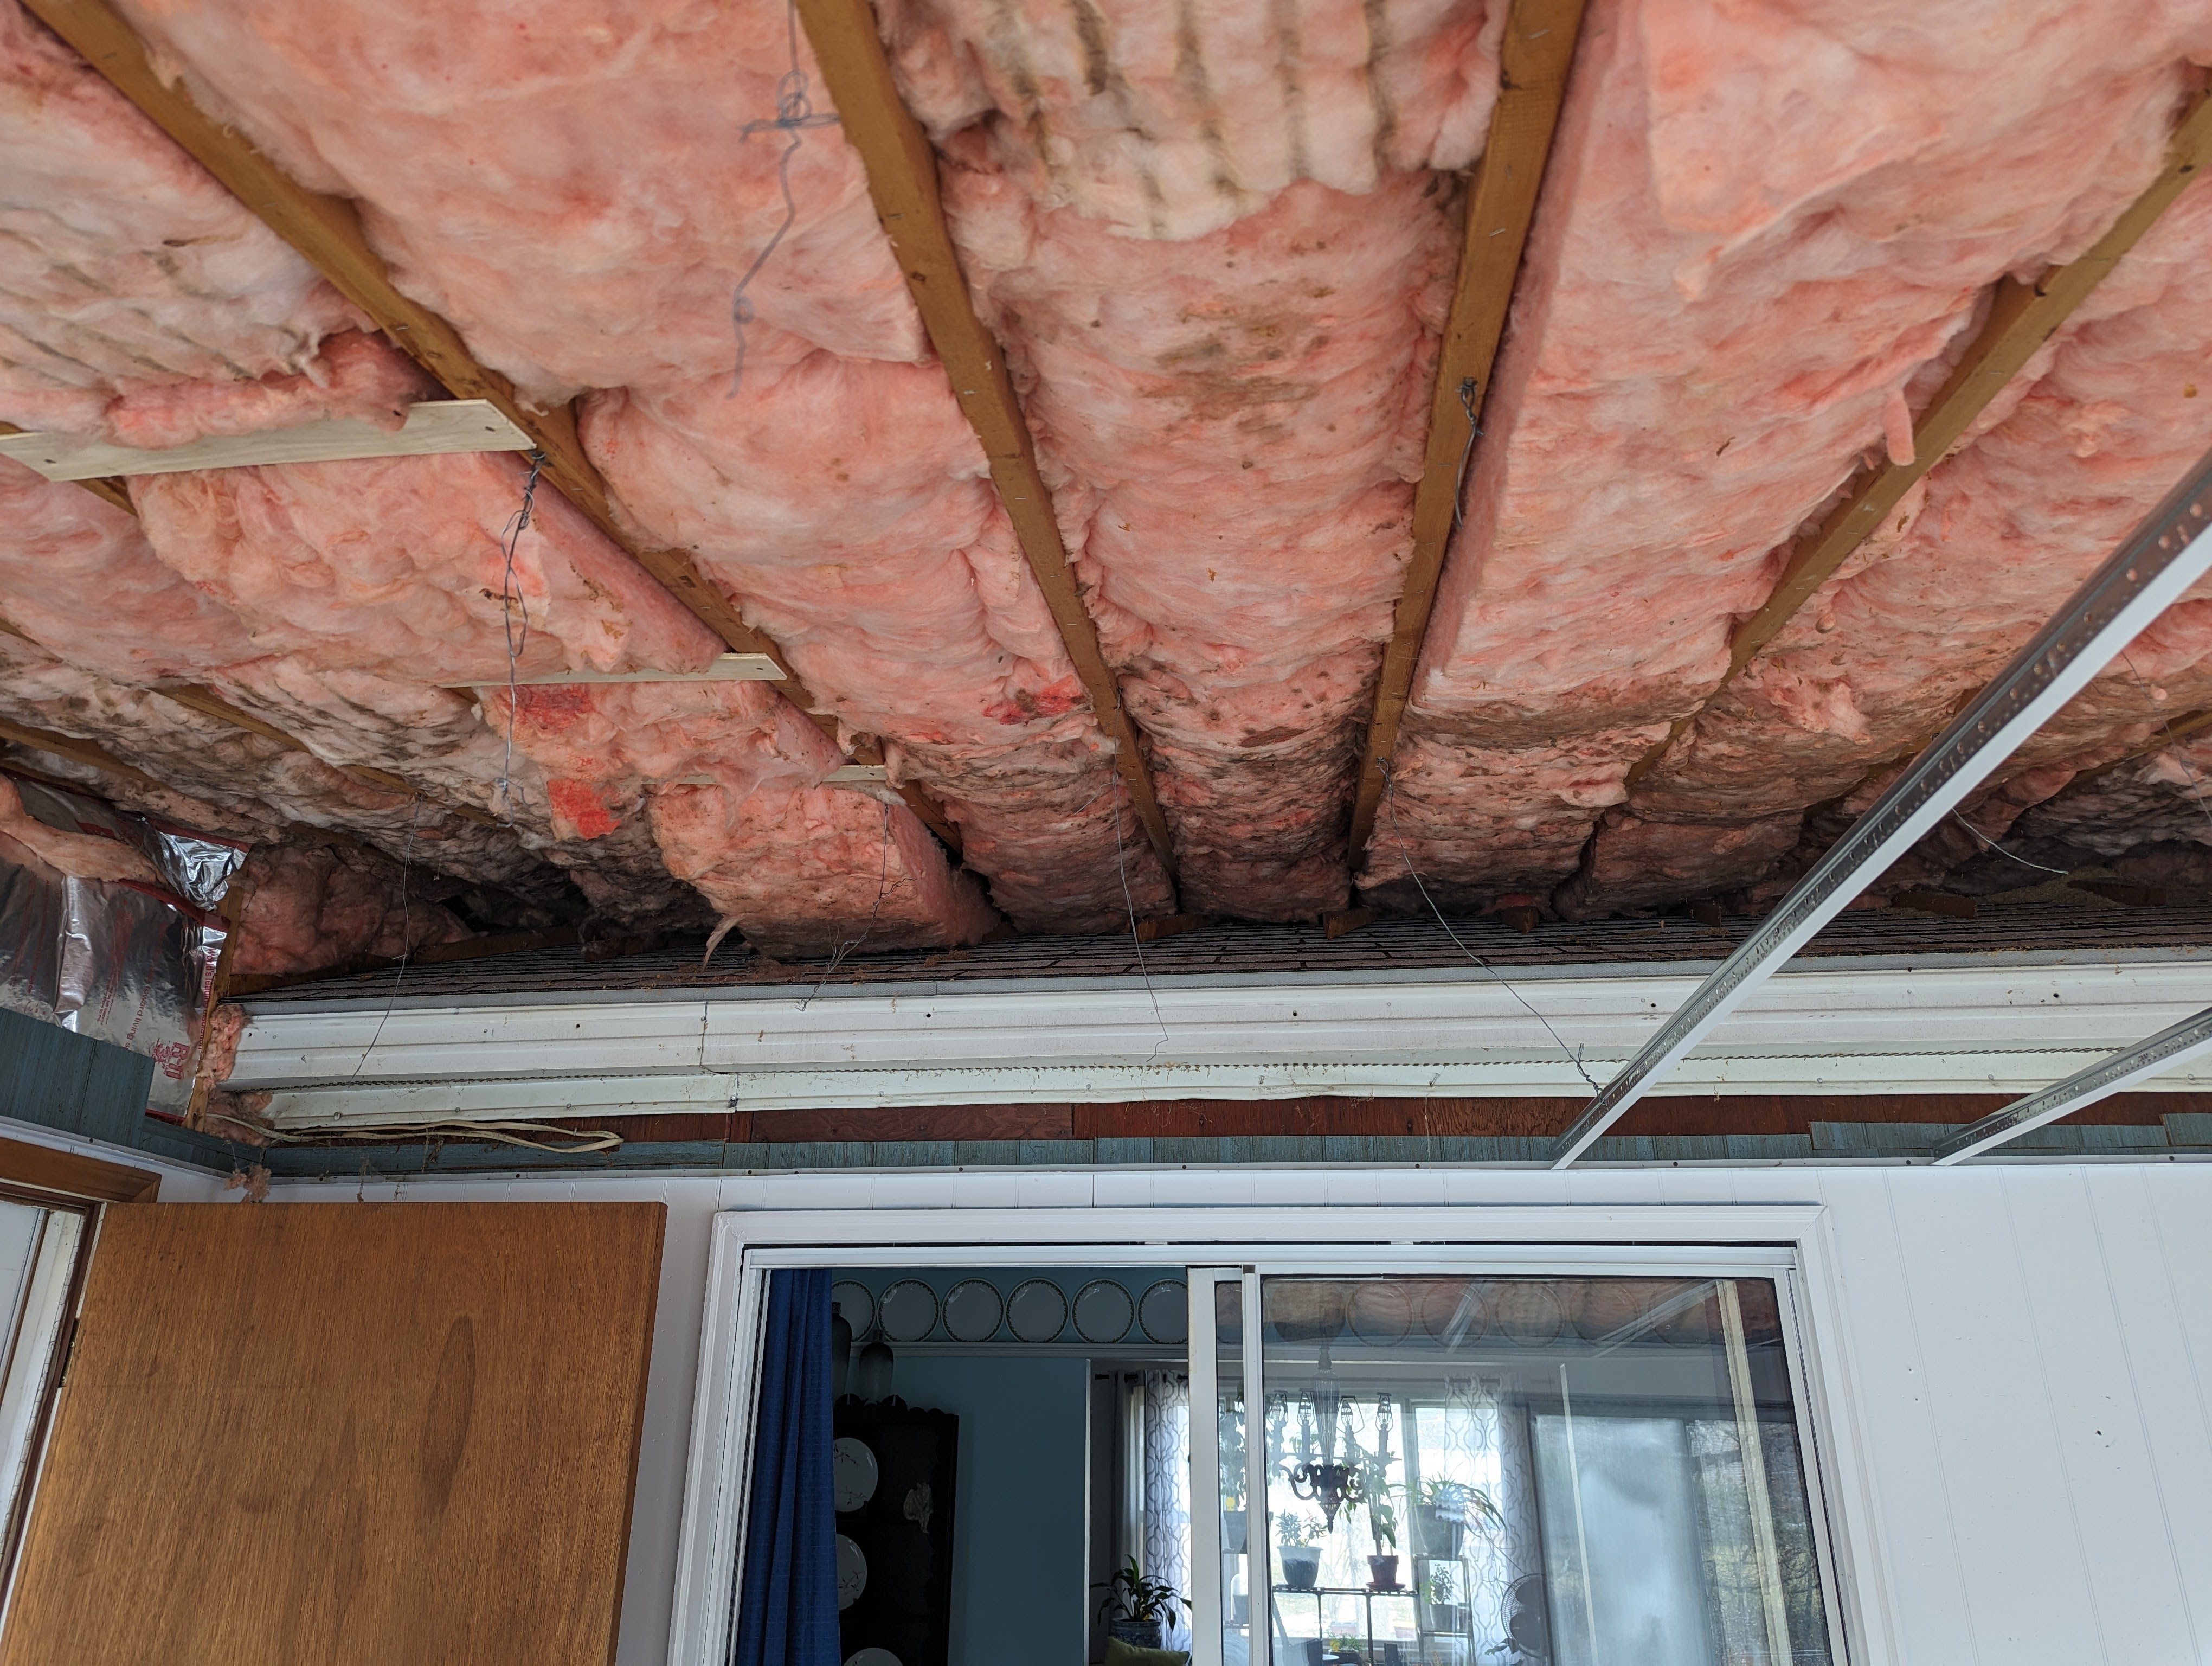
As we planned our renovation, we discovered some surprising challenges in our three-season room. When we lifted the drop ceiling tiles, we realized we could create a beautiful sloped drywall ceiling. However, removing the ceiling tiles and support structure revealed the old roof line underneath and insulation with mildew.
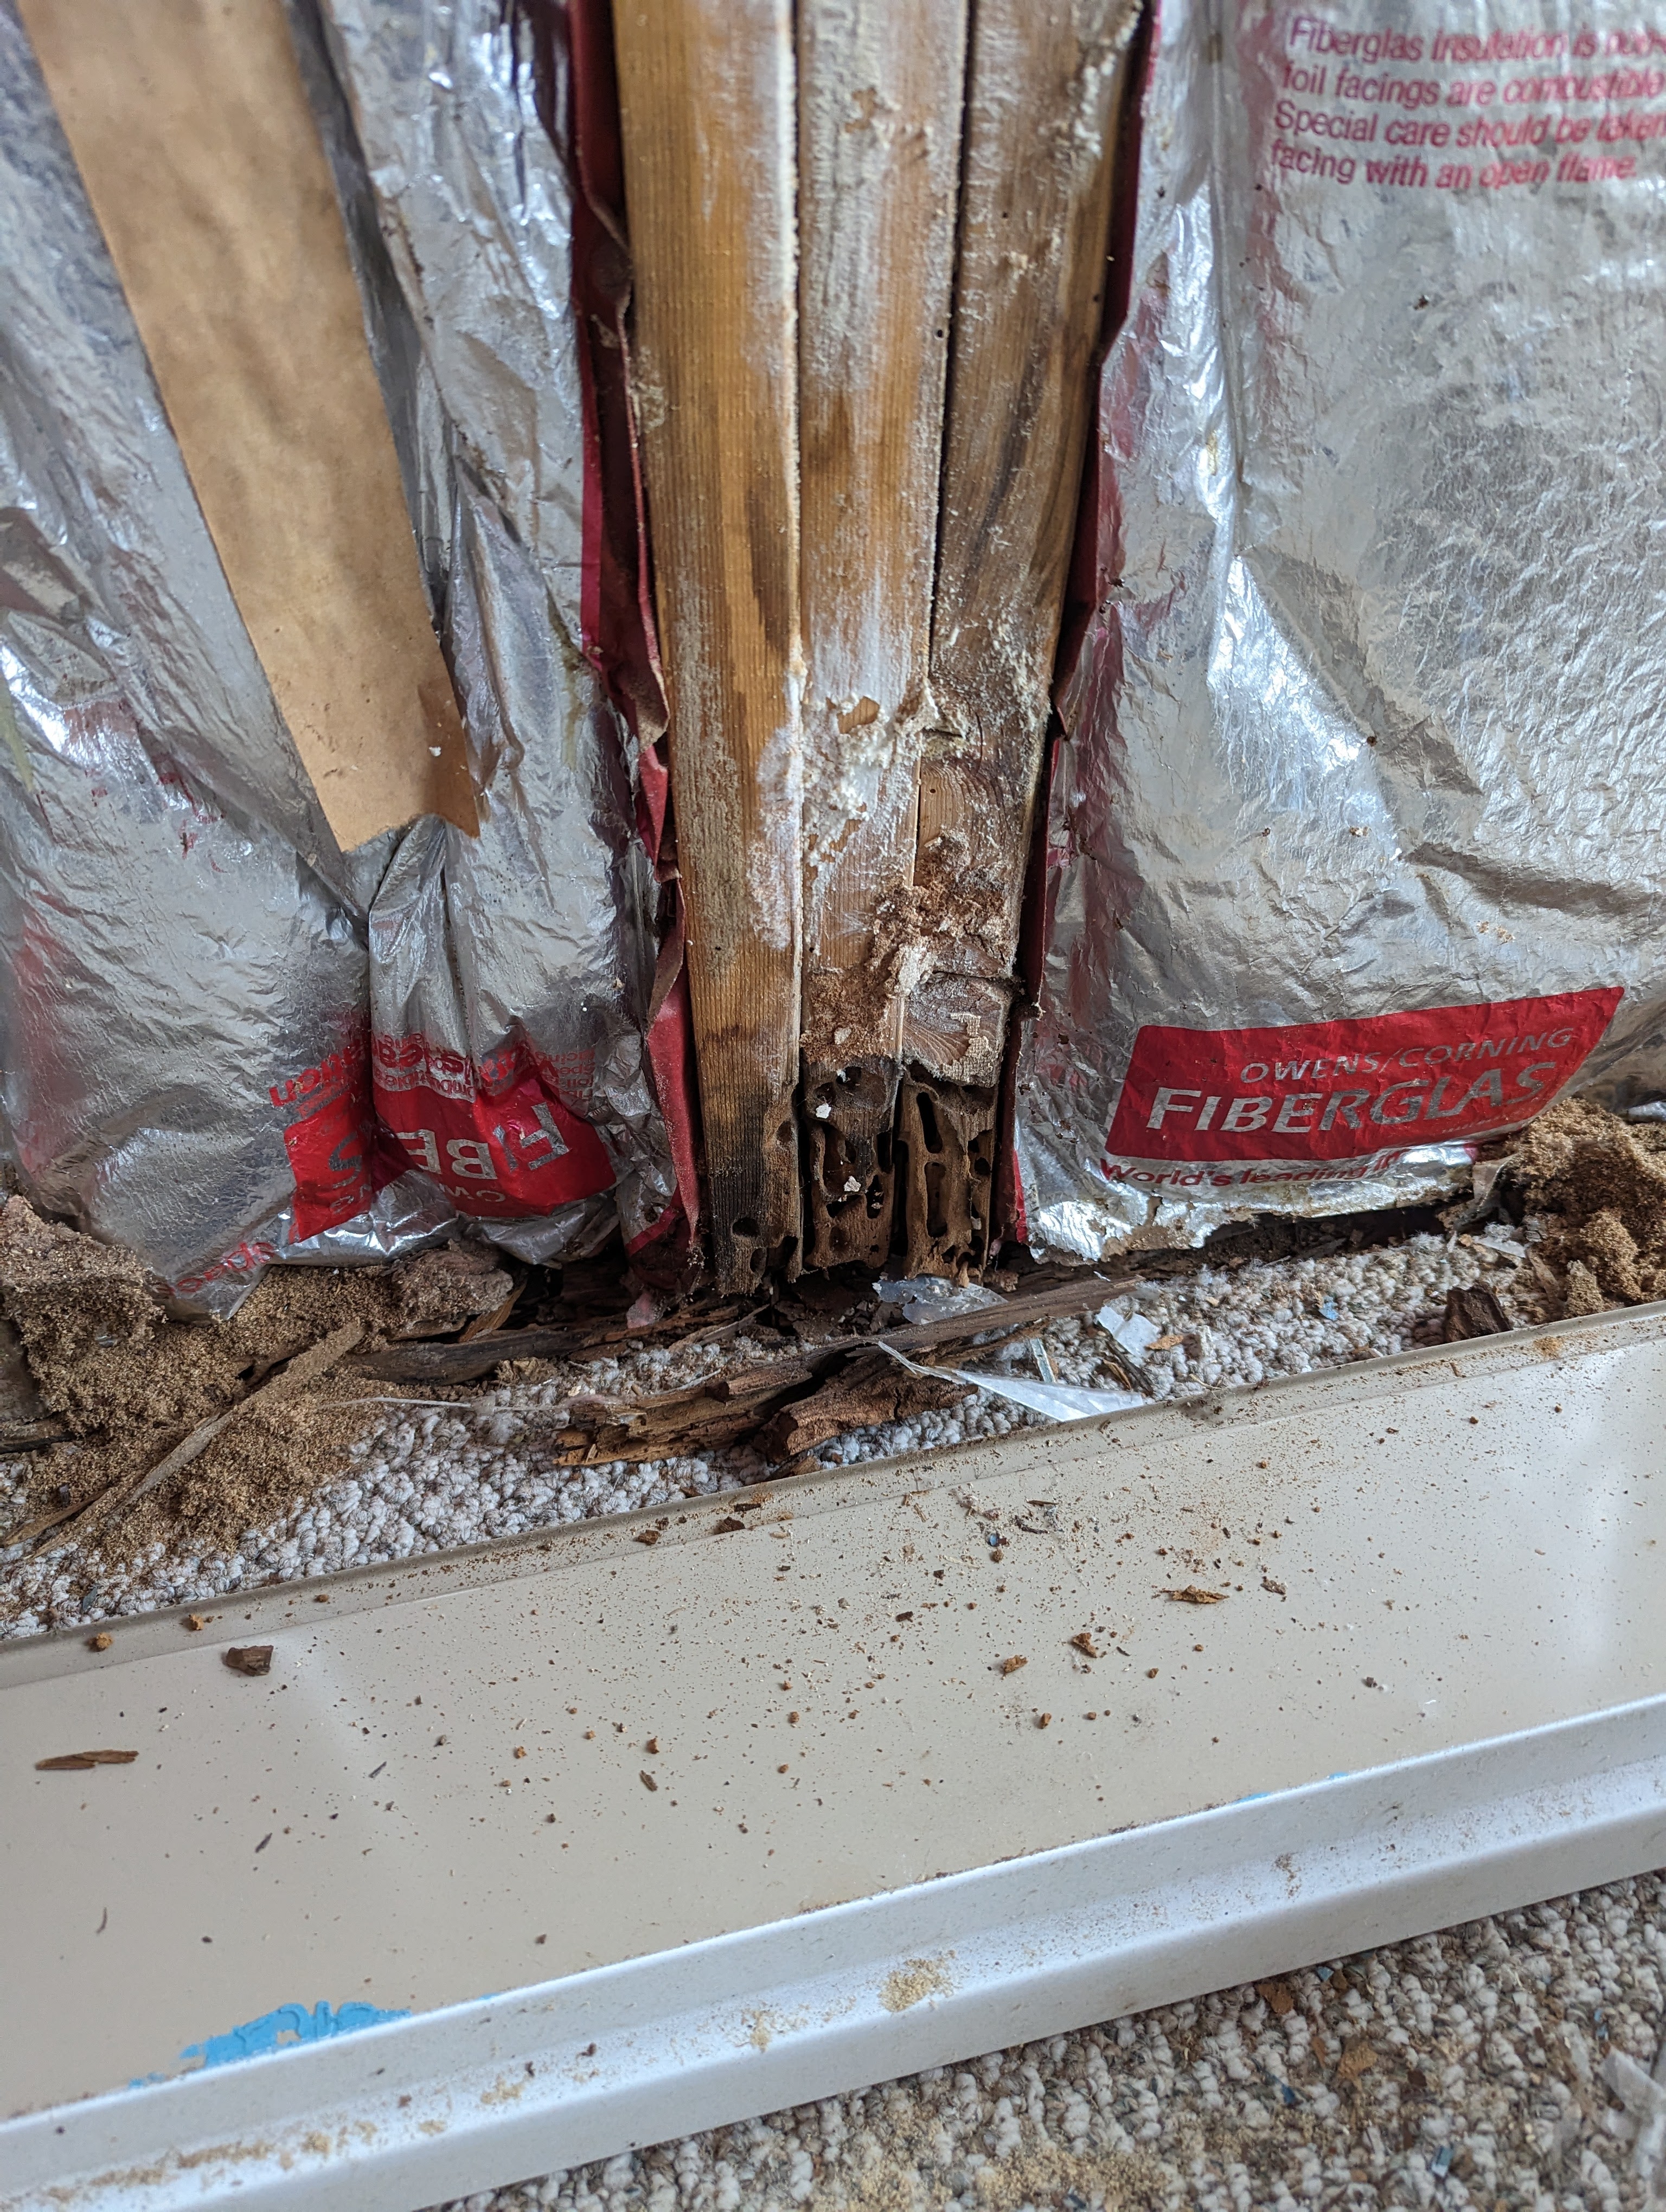
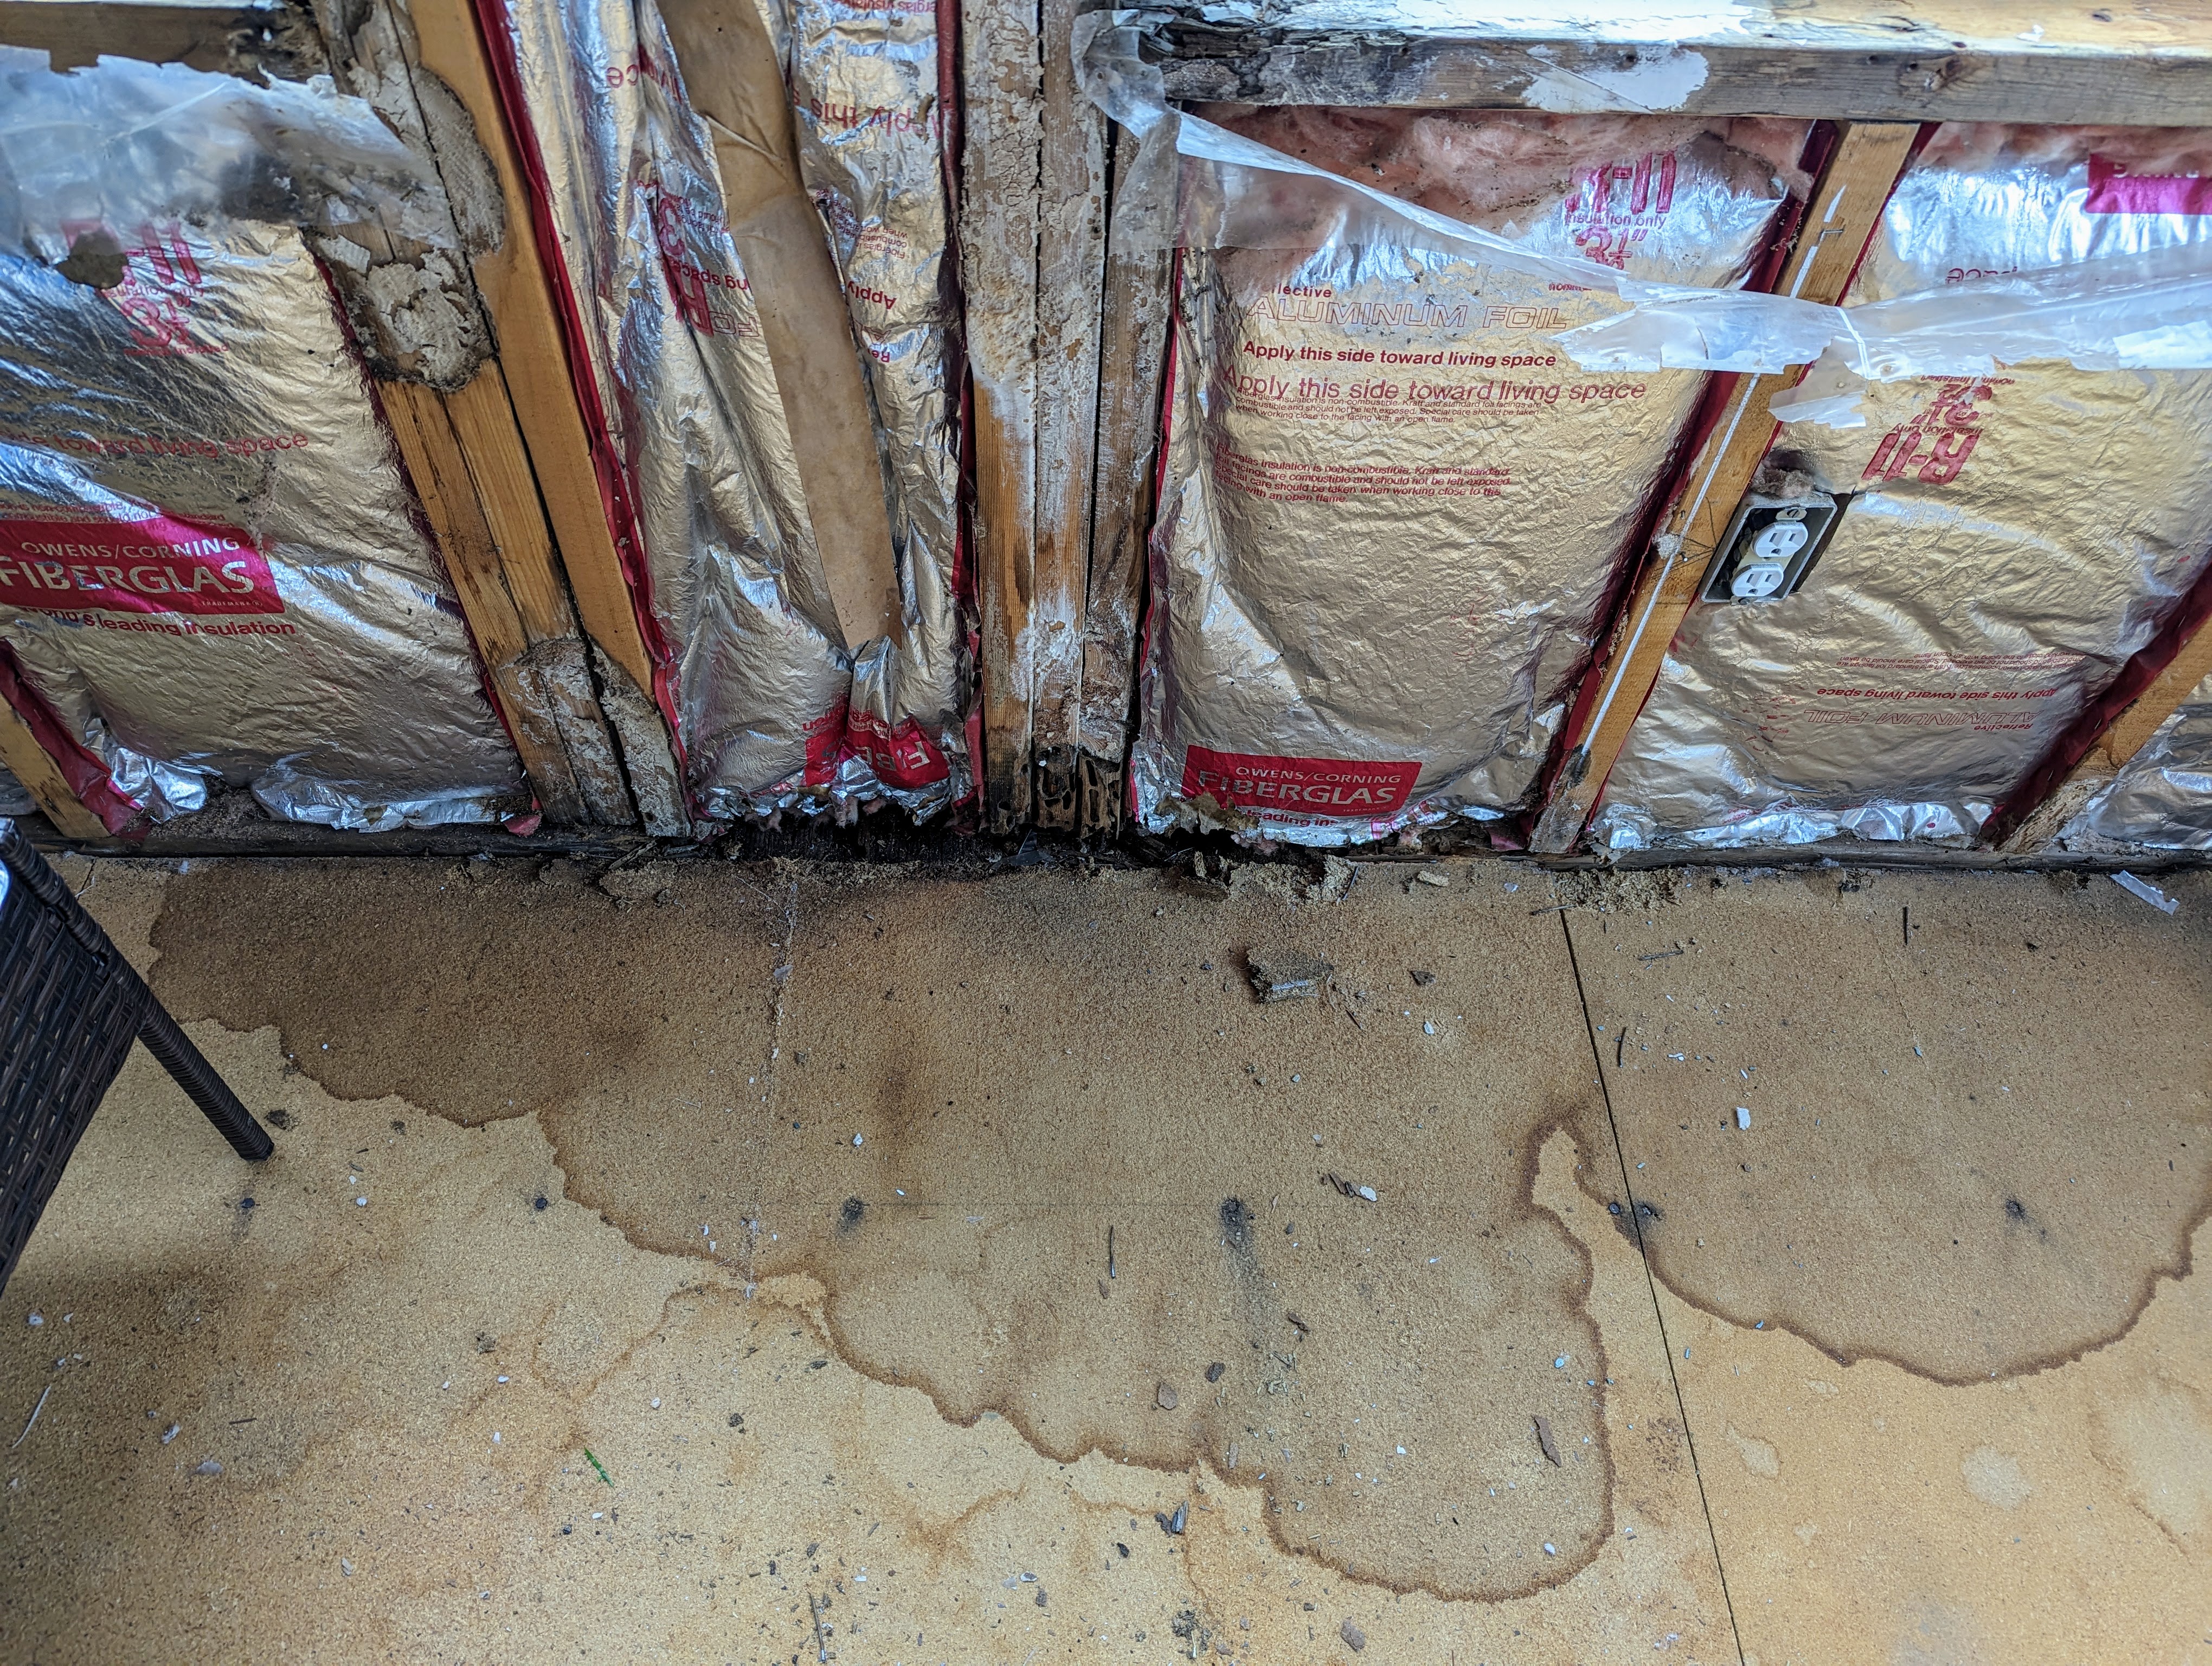
Next, we removed the paneling from the walls and found that the insulation there was also mildewed. During our inspection, we learned that the house had signs of carpenter ant damage and evidence of past water damage in a few areas. The room’s studs and flooring showed visible signs of water damage and carpenter ant activity. Several studs on the south-facing wall didn’t even touch the sill plate, and there were rotten spots on the floor. We took out all of the compromised insulation and thoroughly cleaned the space.
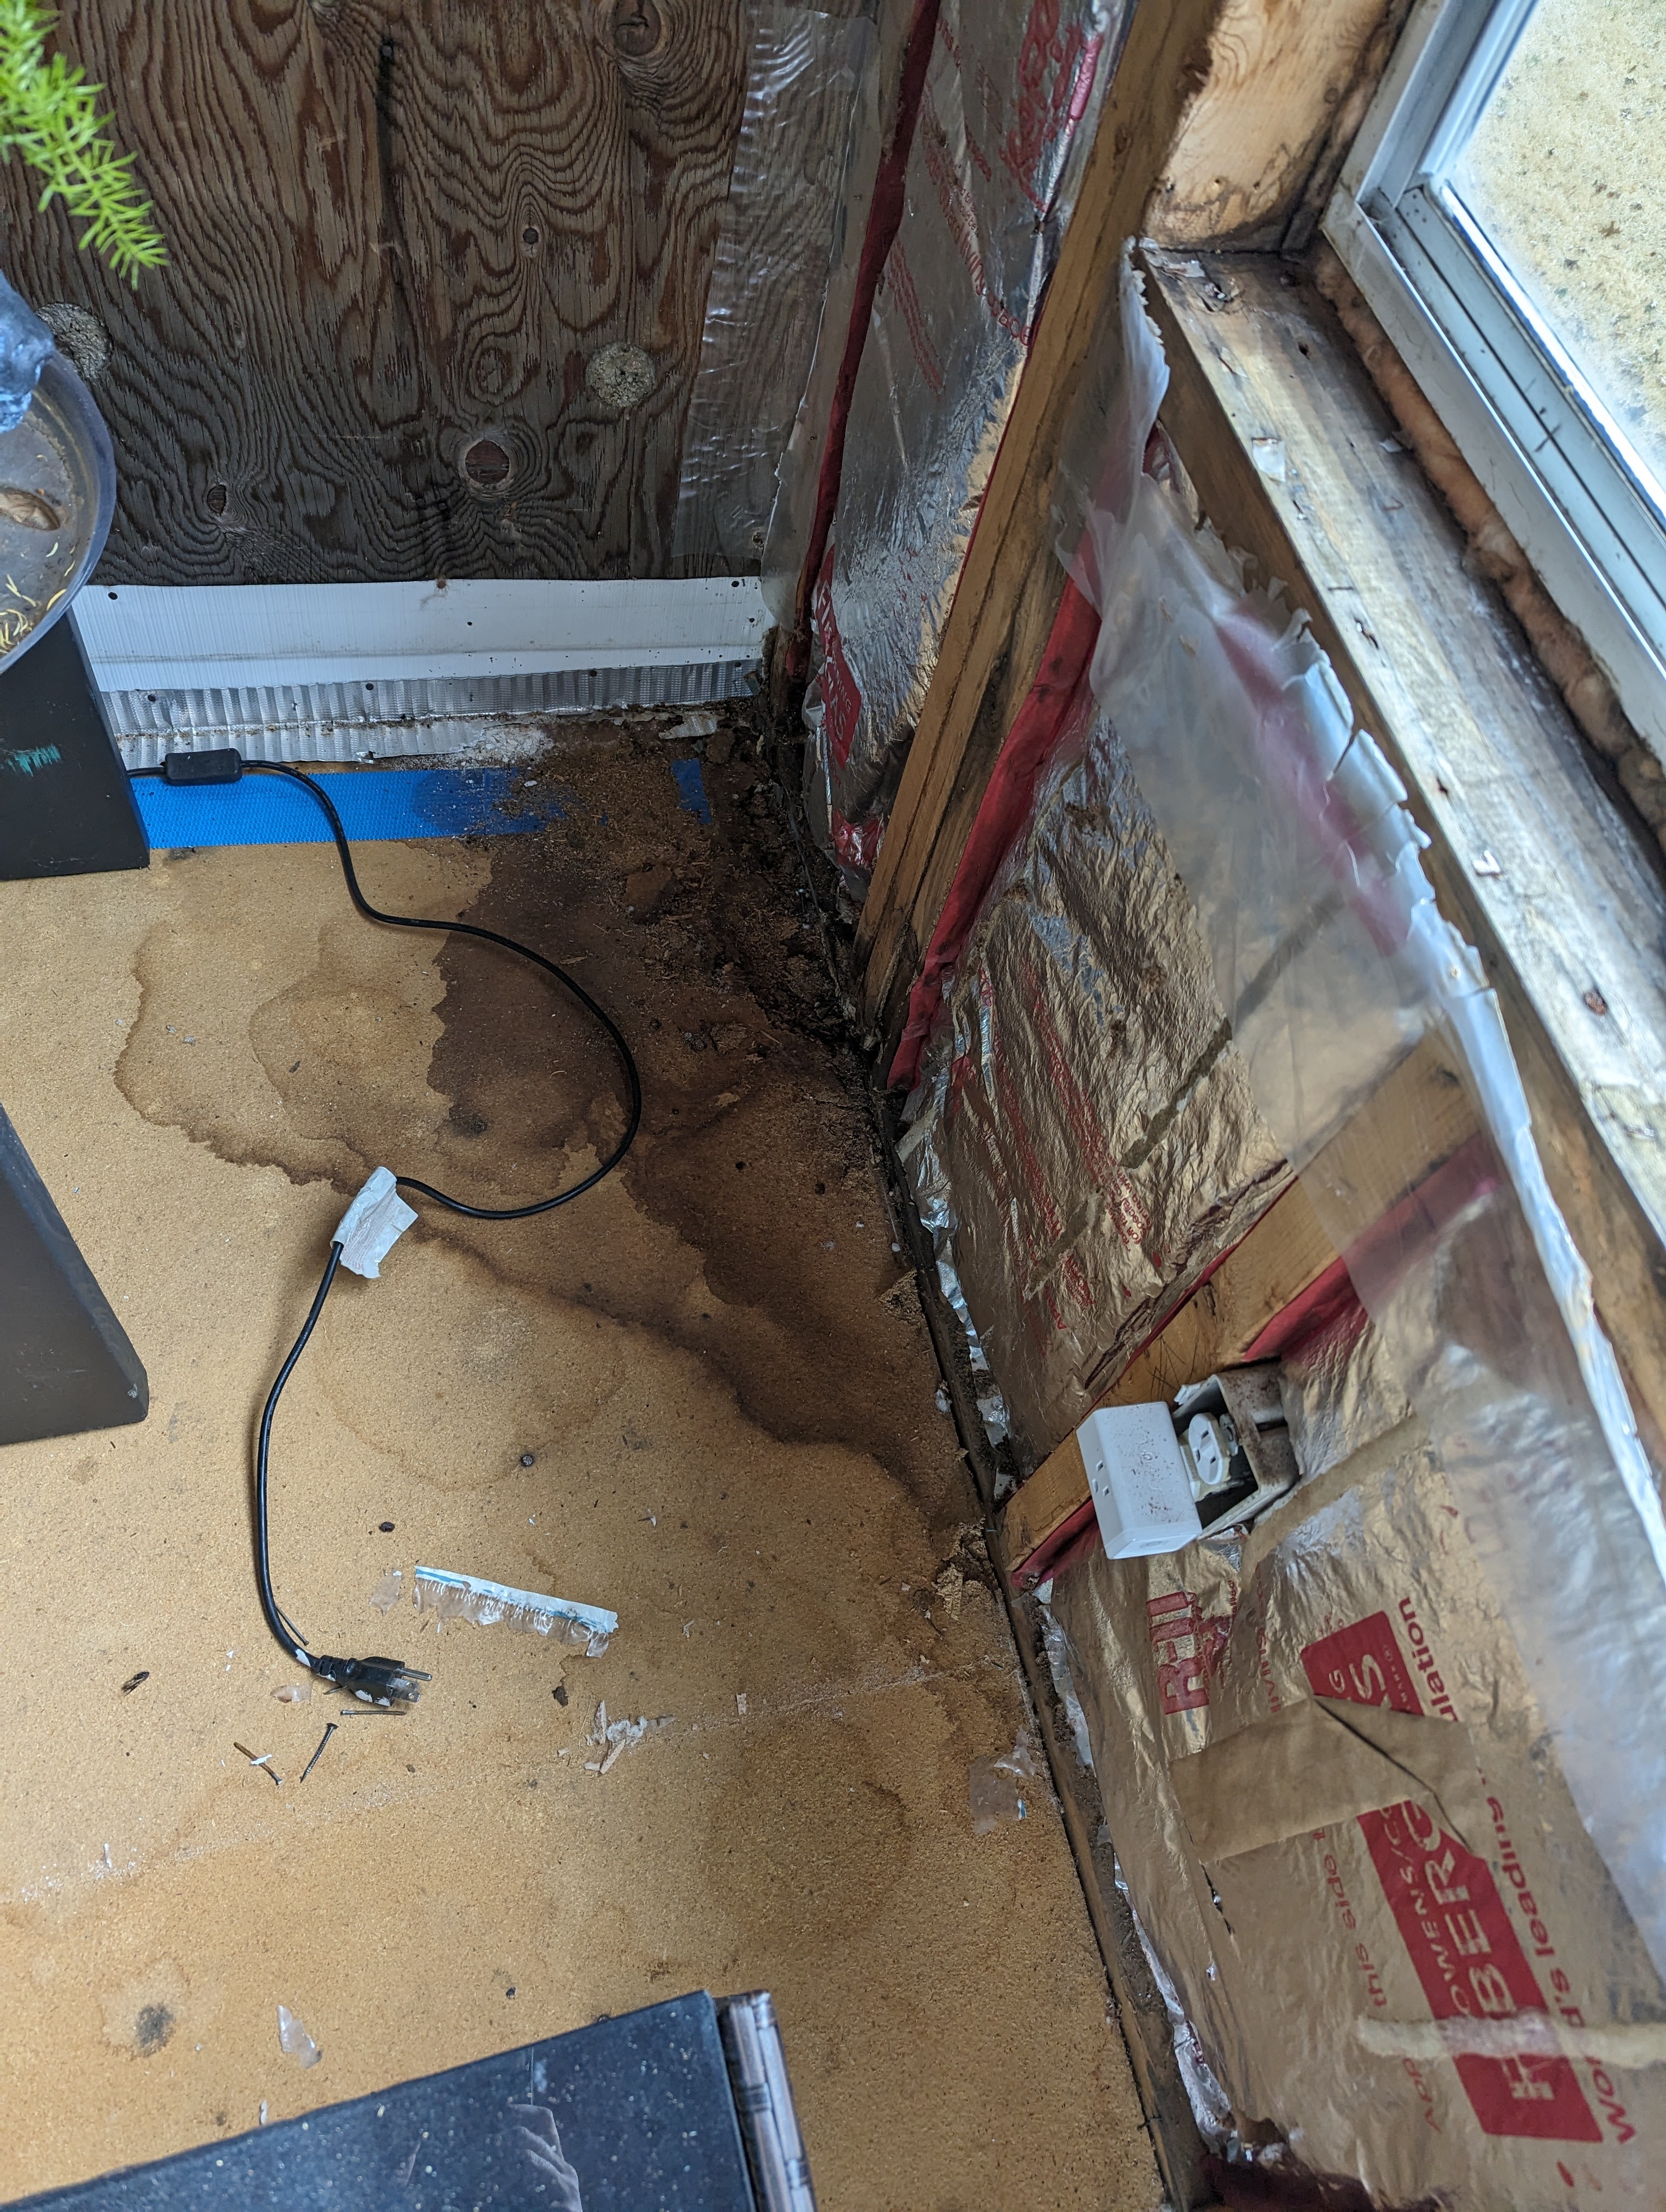
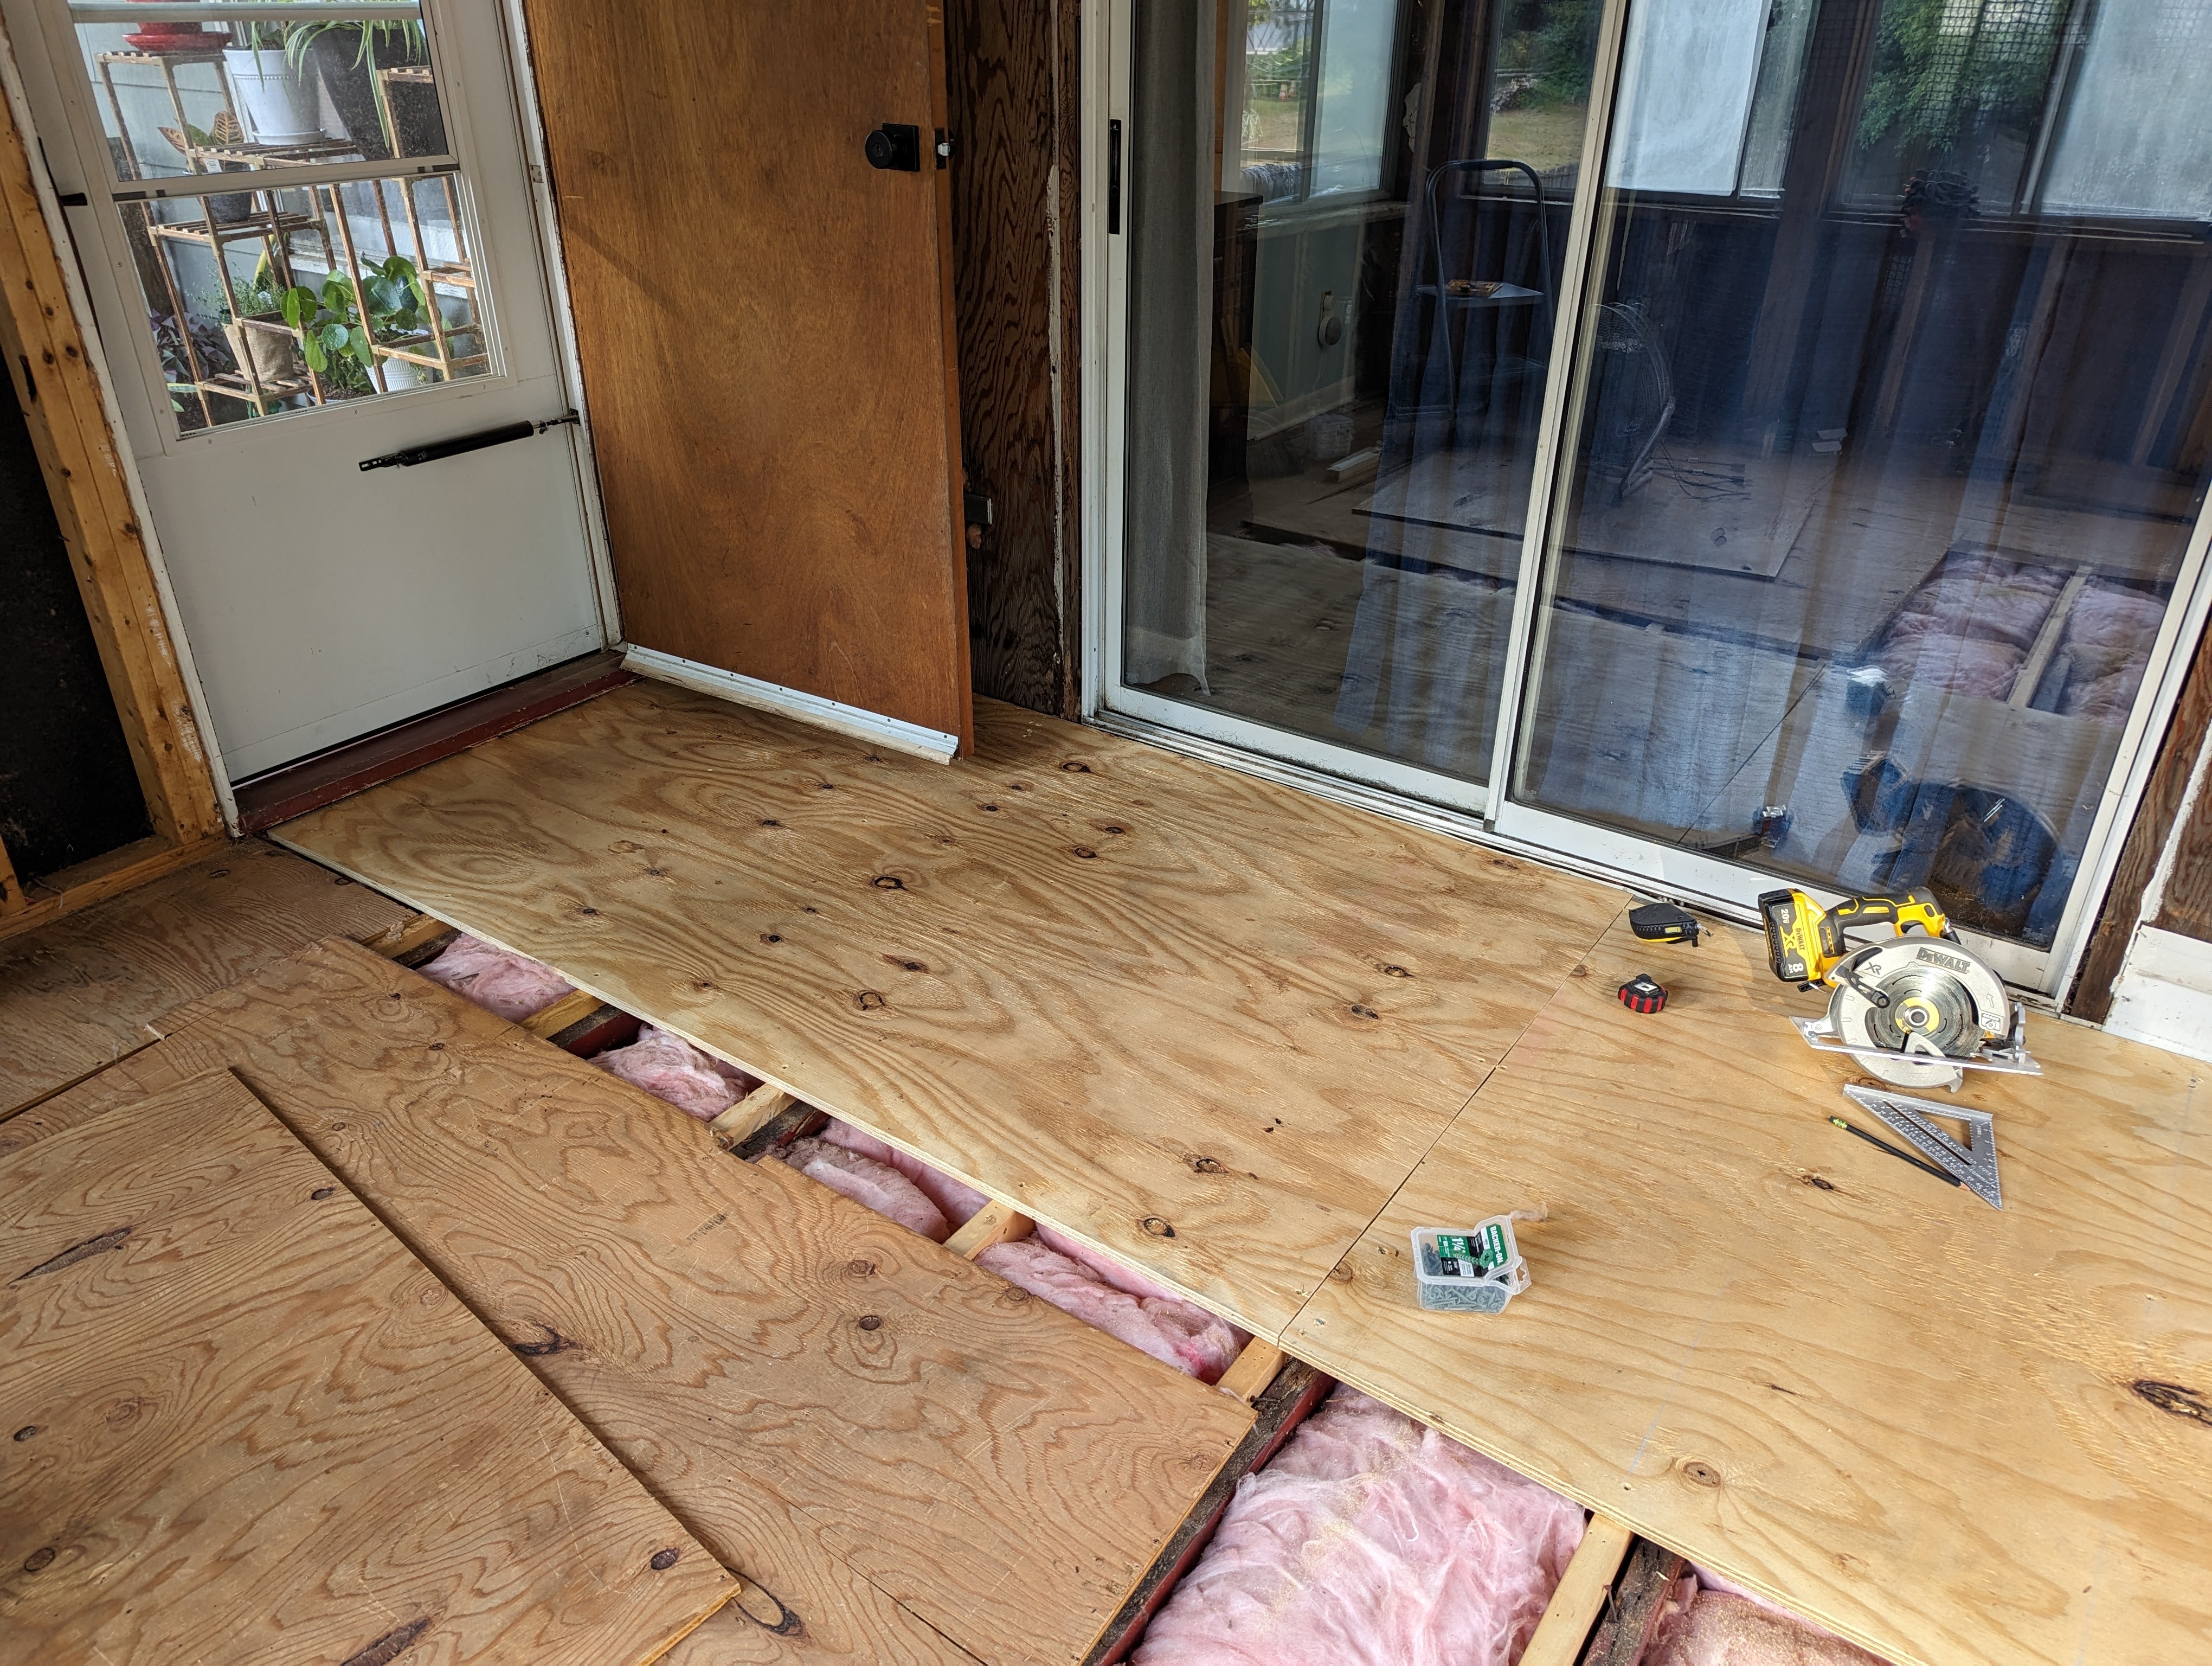
Our next step in the renovation was tackling the flooring. We started by removing the first layer of OSB flooring, only to find 1/2″ plywood underneath. Unfortunately, the plywood had weak spots, so we decided to replace it with 3/4″ plywood for better durability. Since the plywood extended under the sill plate, we had to cut along the wall to remove it.
Next, we unhooked the electrical outlets, cut away the rotten portions of the sill plate, and replaced them with new 2×6 pieces. To support these and provide a solid base for the new flooring, we added a couple of 2×4 pieces underneath.
So far, we’ve completed the first section of flooring. There’s still a long way to go, but we’re making steady progress. We’re excited to share every step of this transformation with you. From selecting energy-efficient windows to choosing the perfect flooring and modernizing the walls and ceiling, we aim to create a cozy, beautiful plant room that thrives in every season. Stay tuned for updates and behind-the-scenes looks at our progress!