Basement Makeover Journey: Part 3 – Bathroom
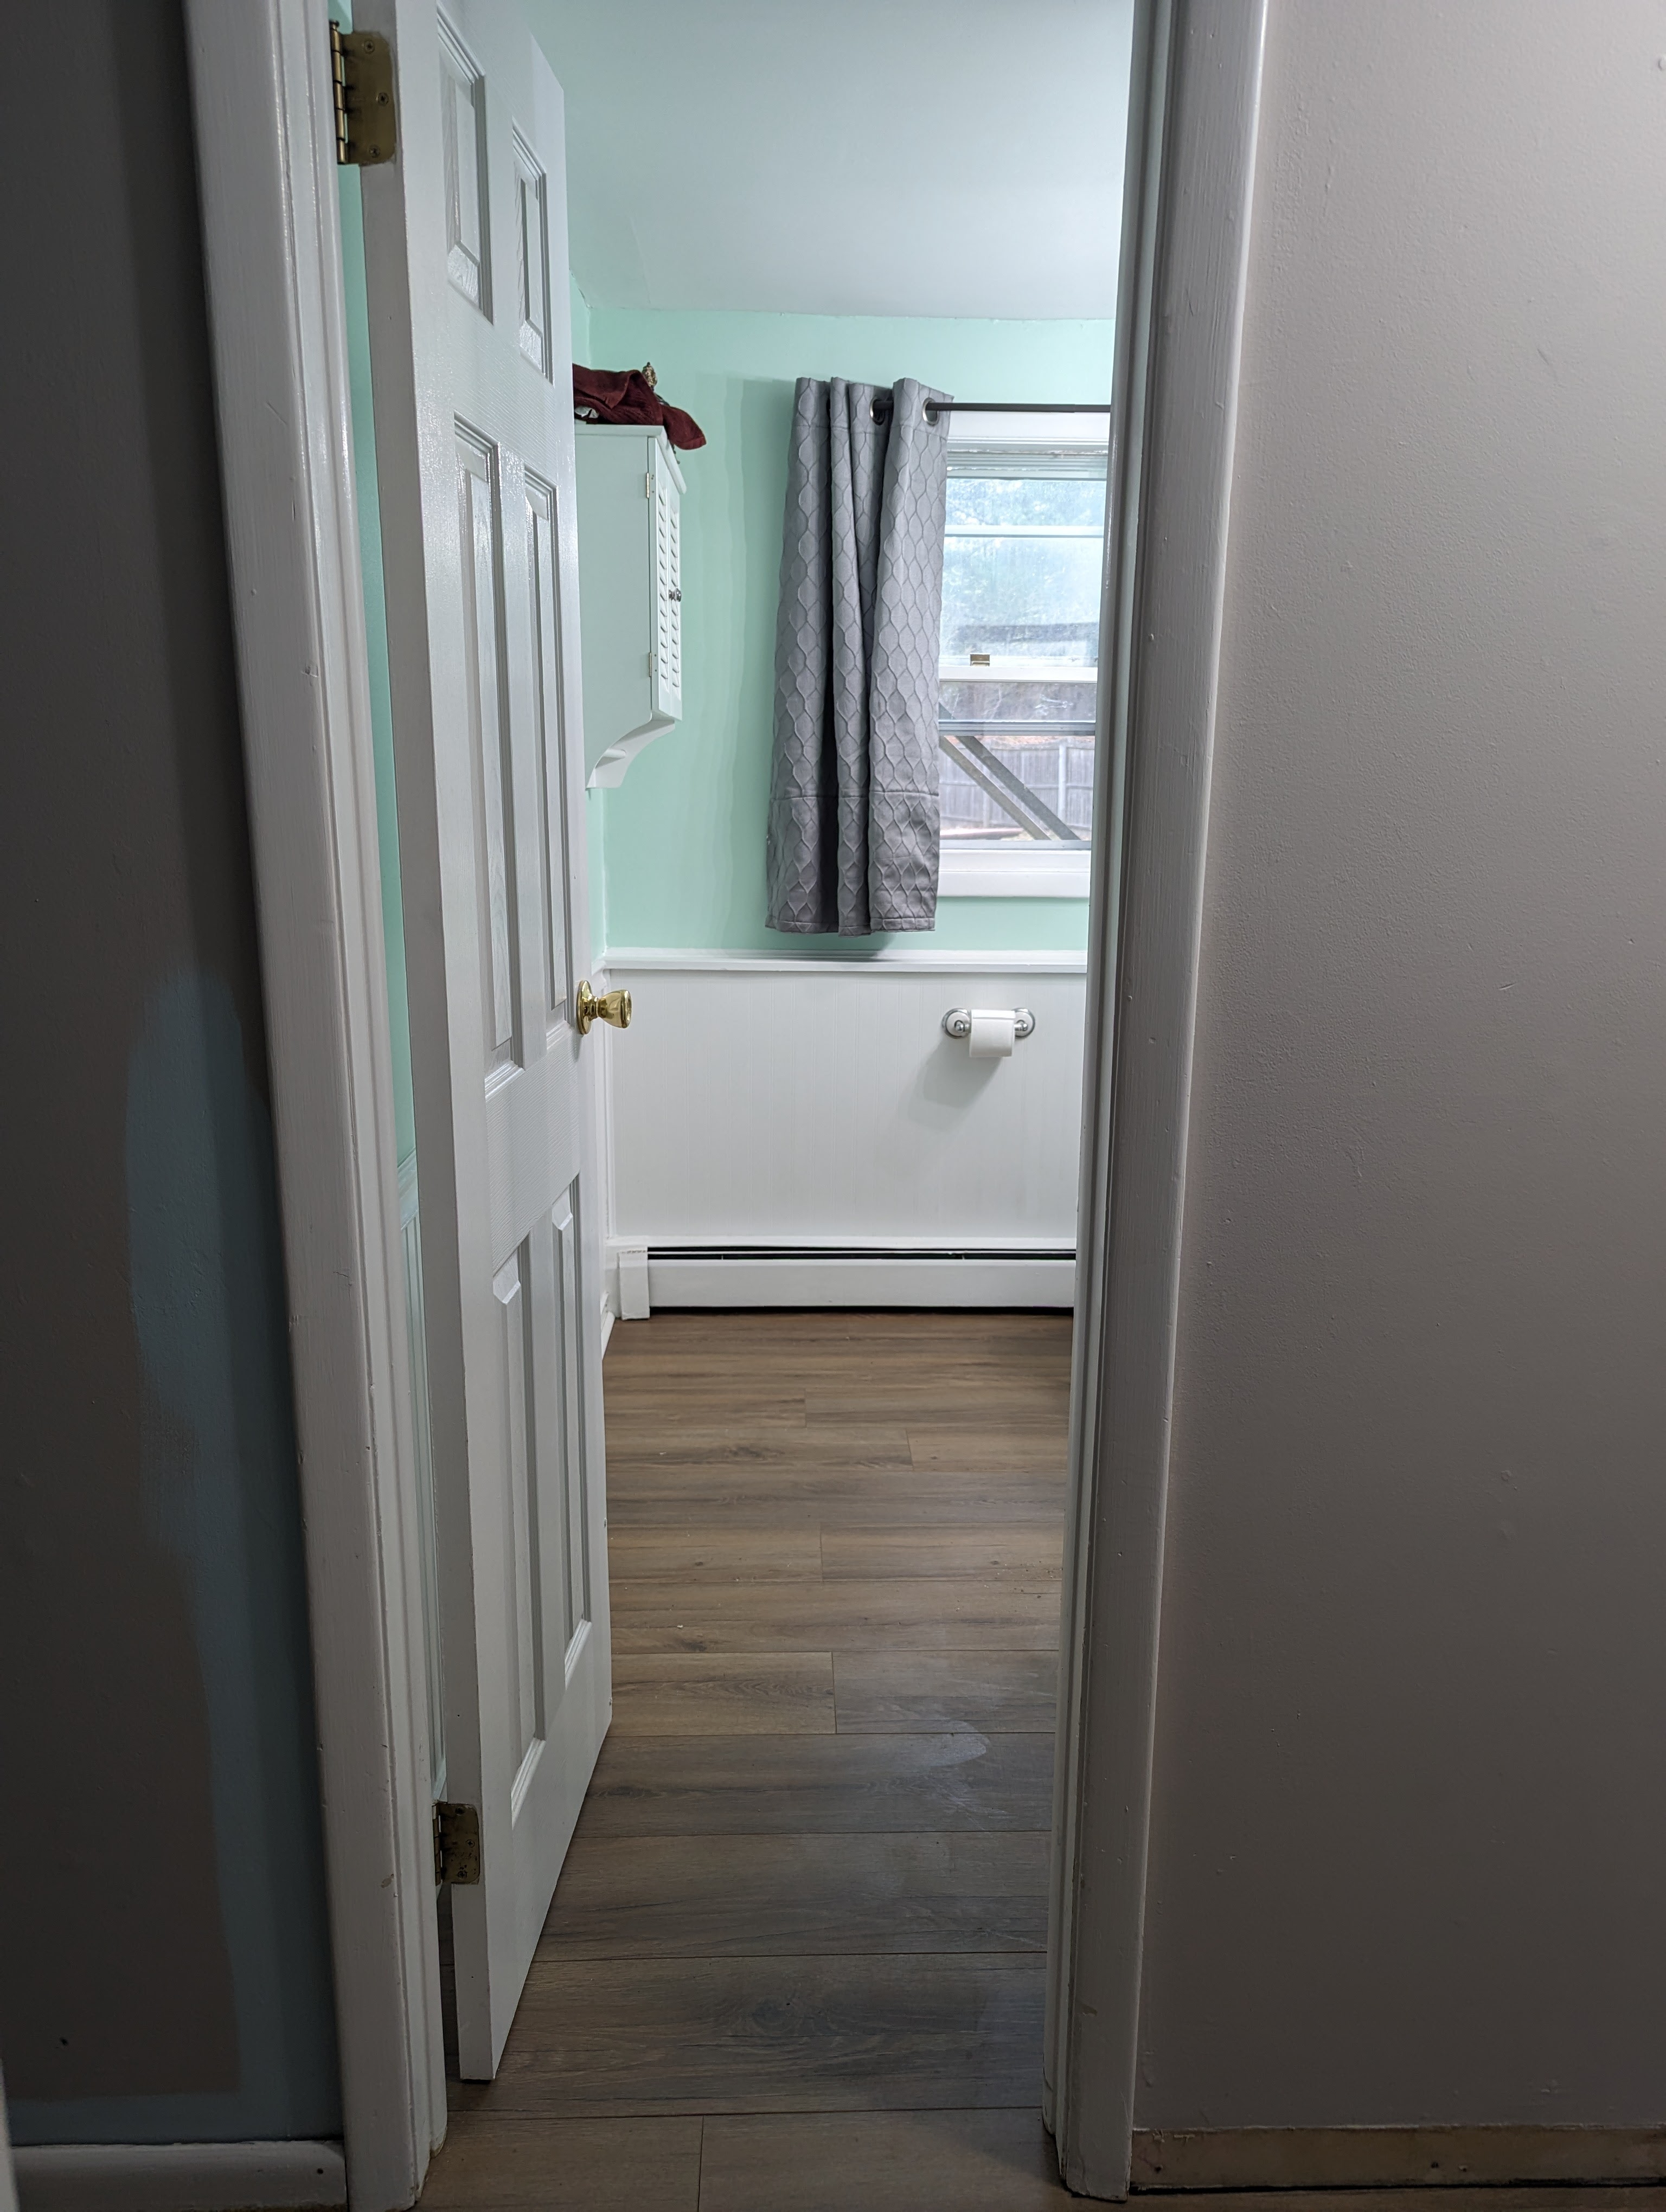
The journey of our basement makeover took an unexpected turn when we reached the bathroom. Despite its small size, we assumed the project would be quick and easy. How wrong we were!
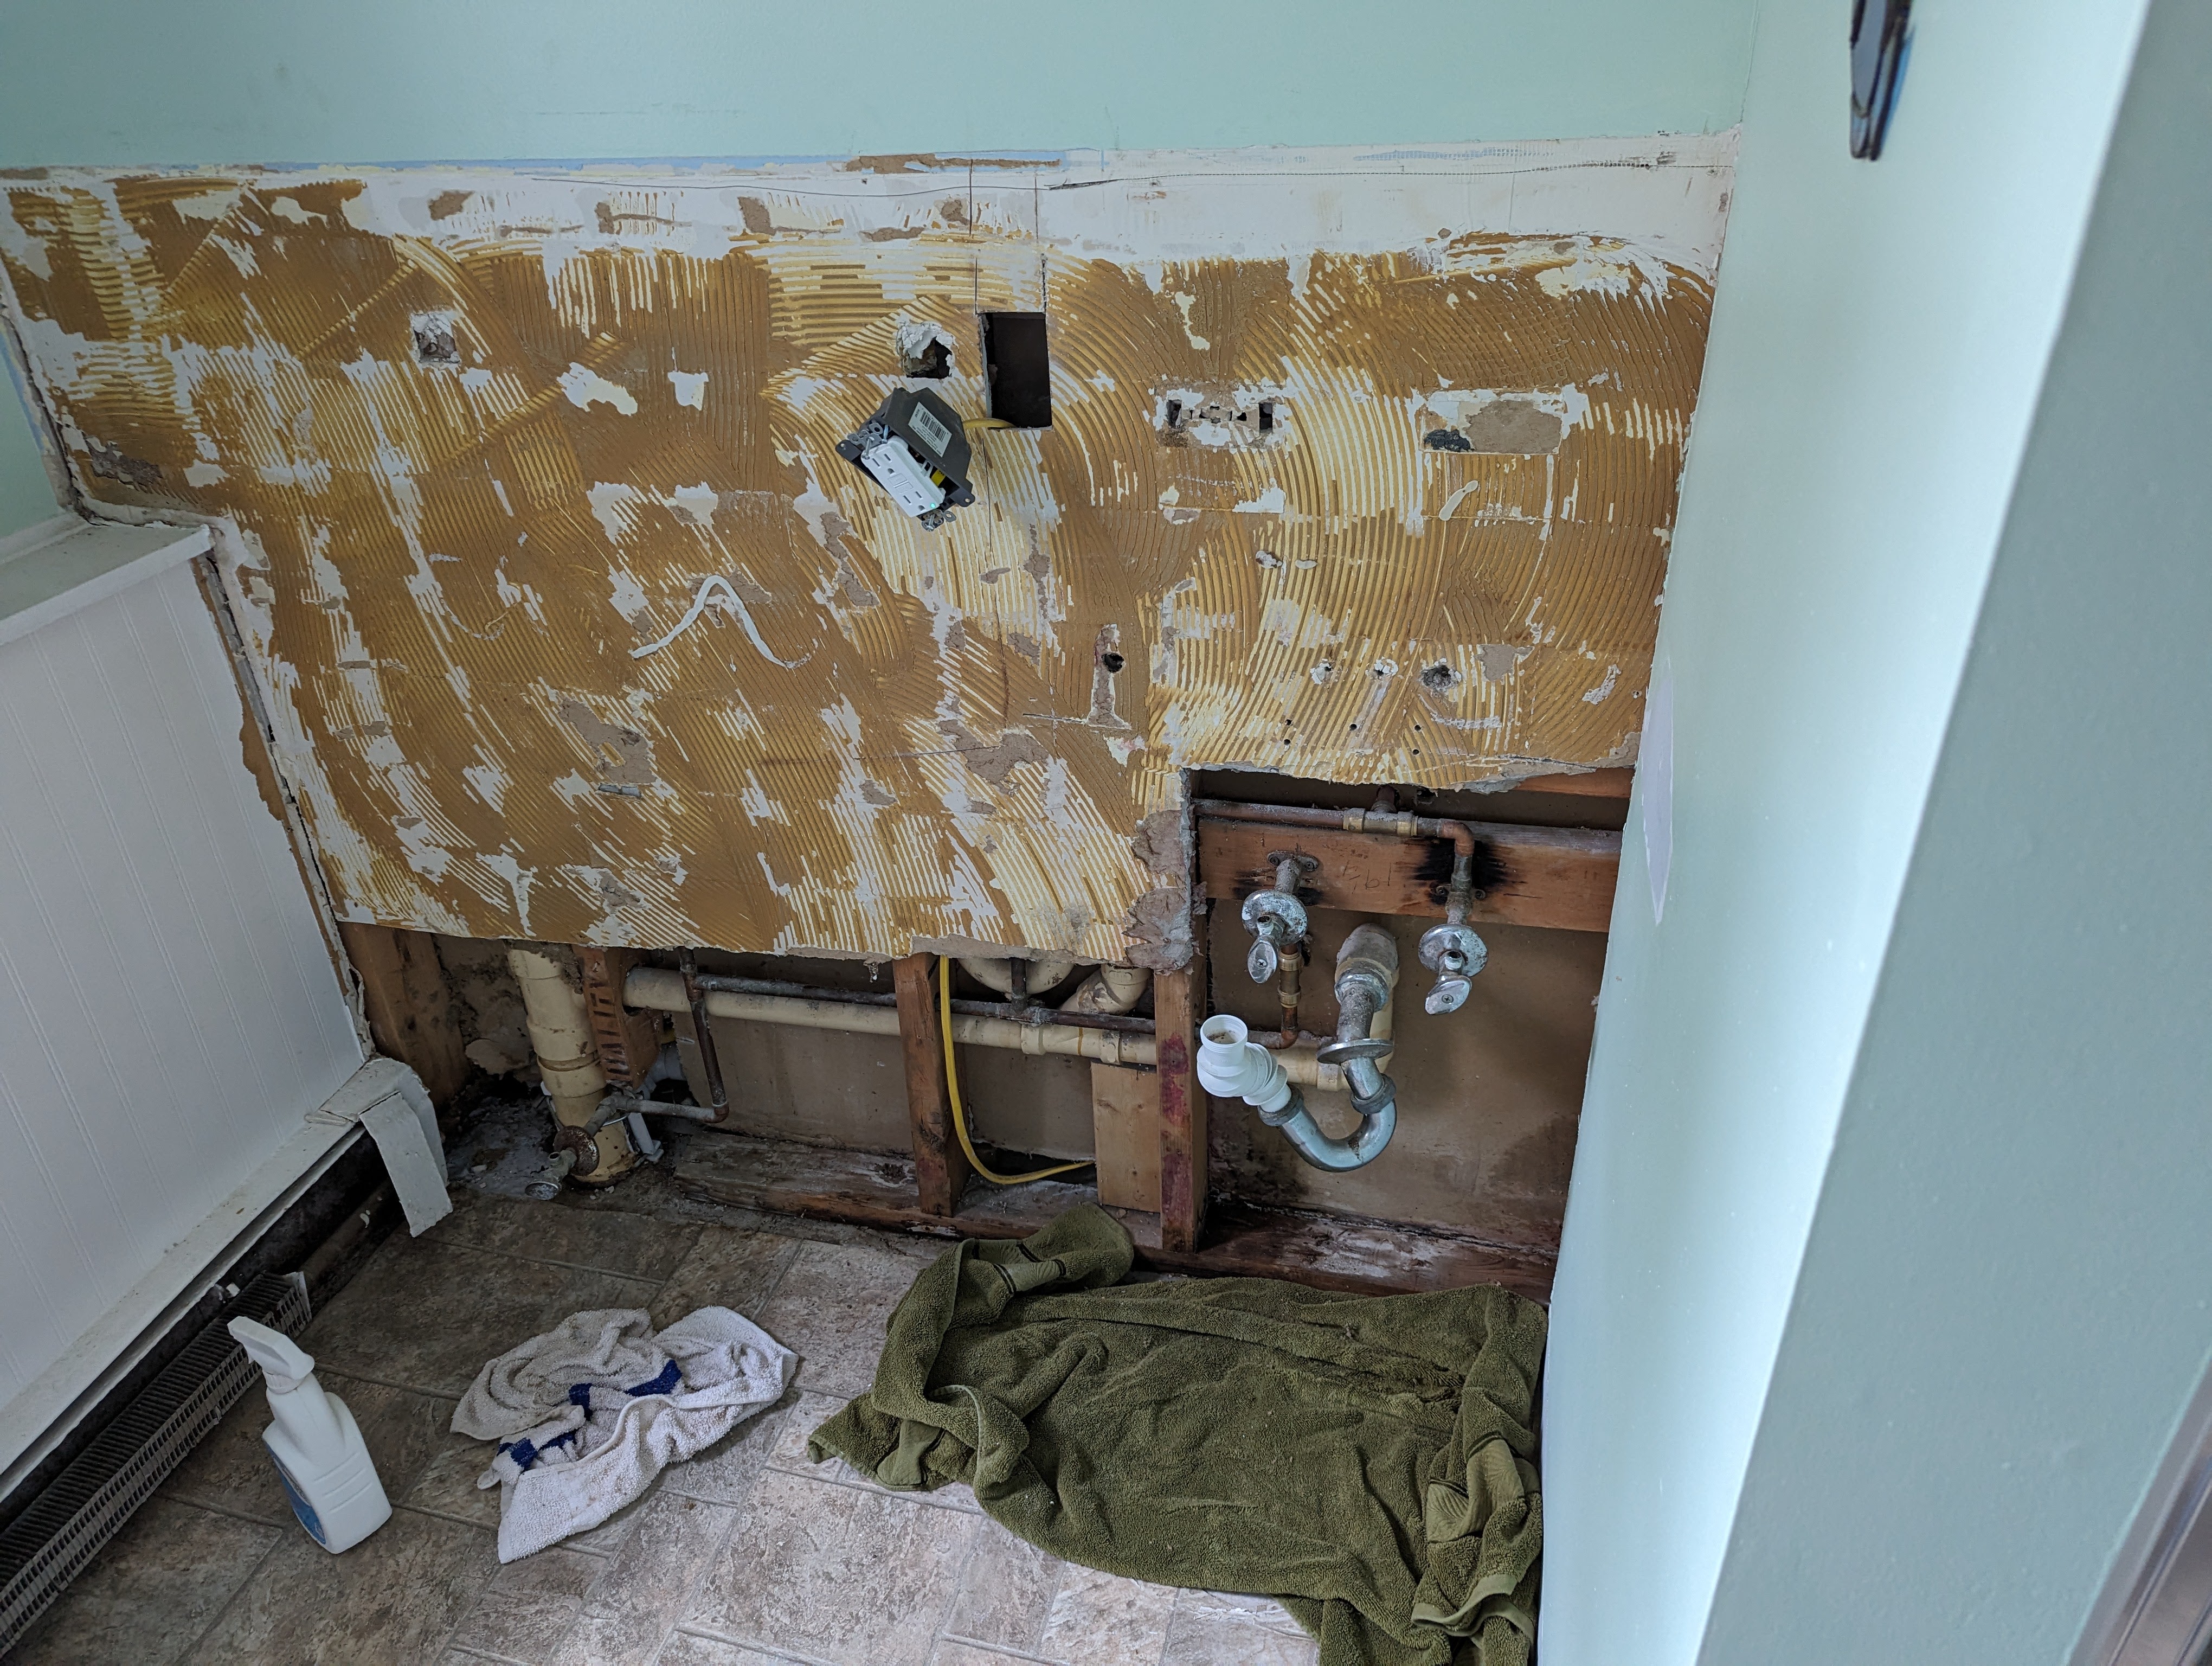
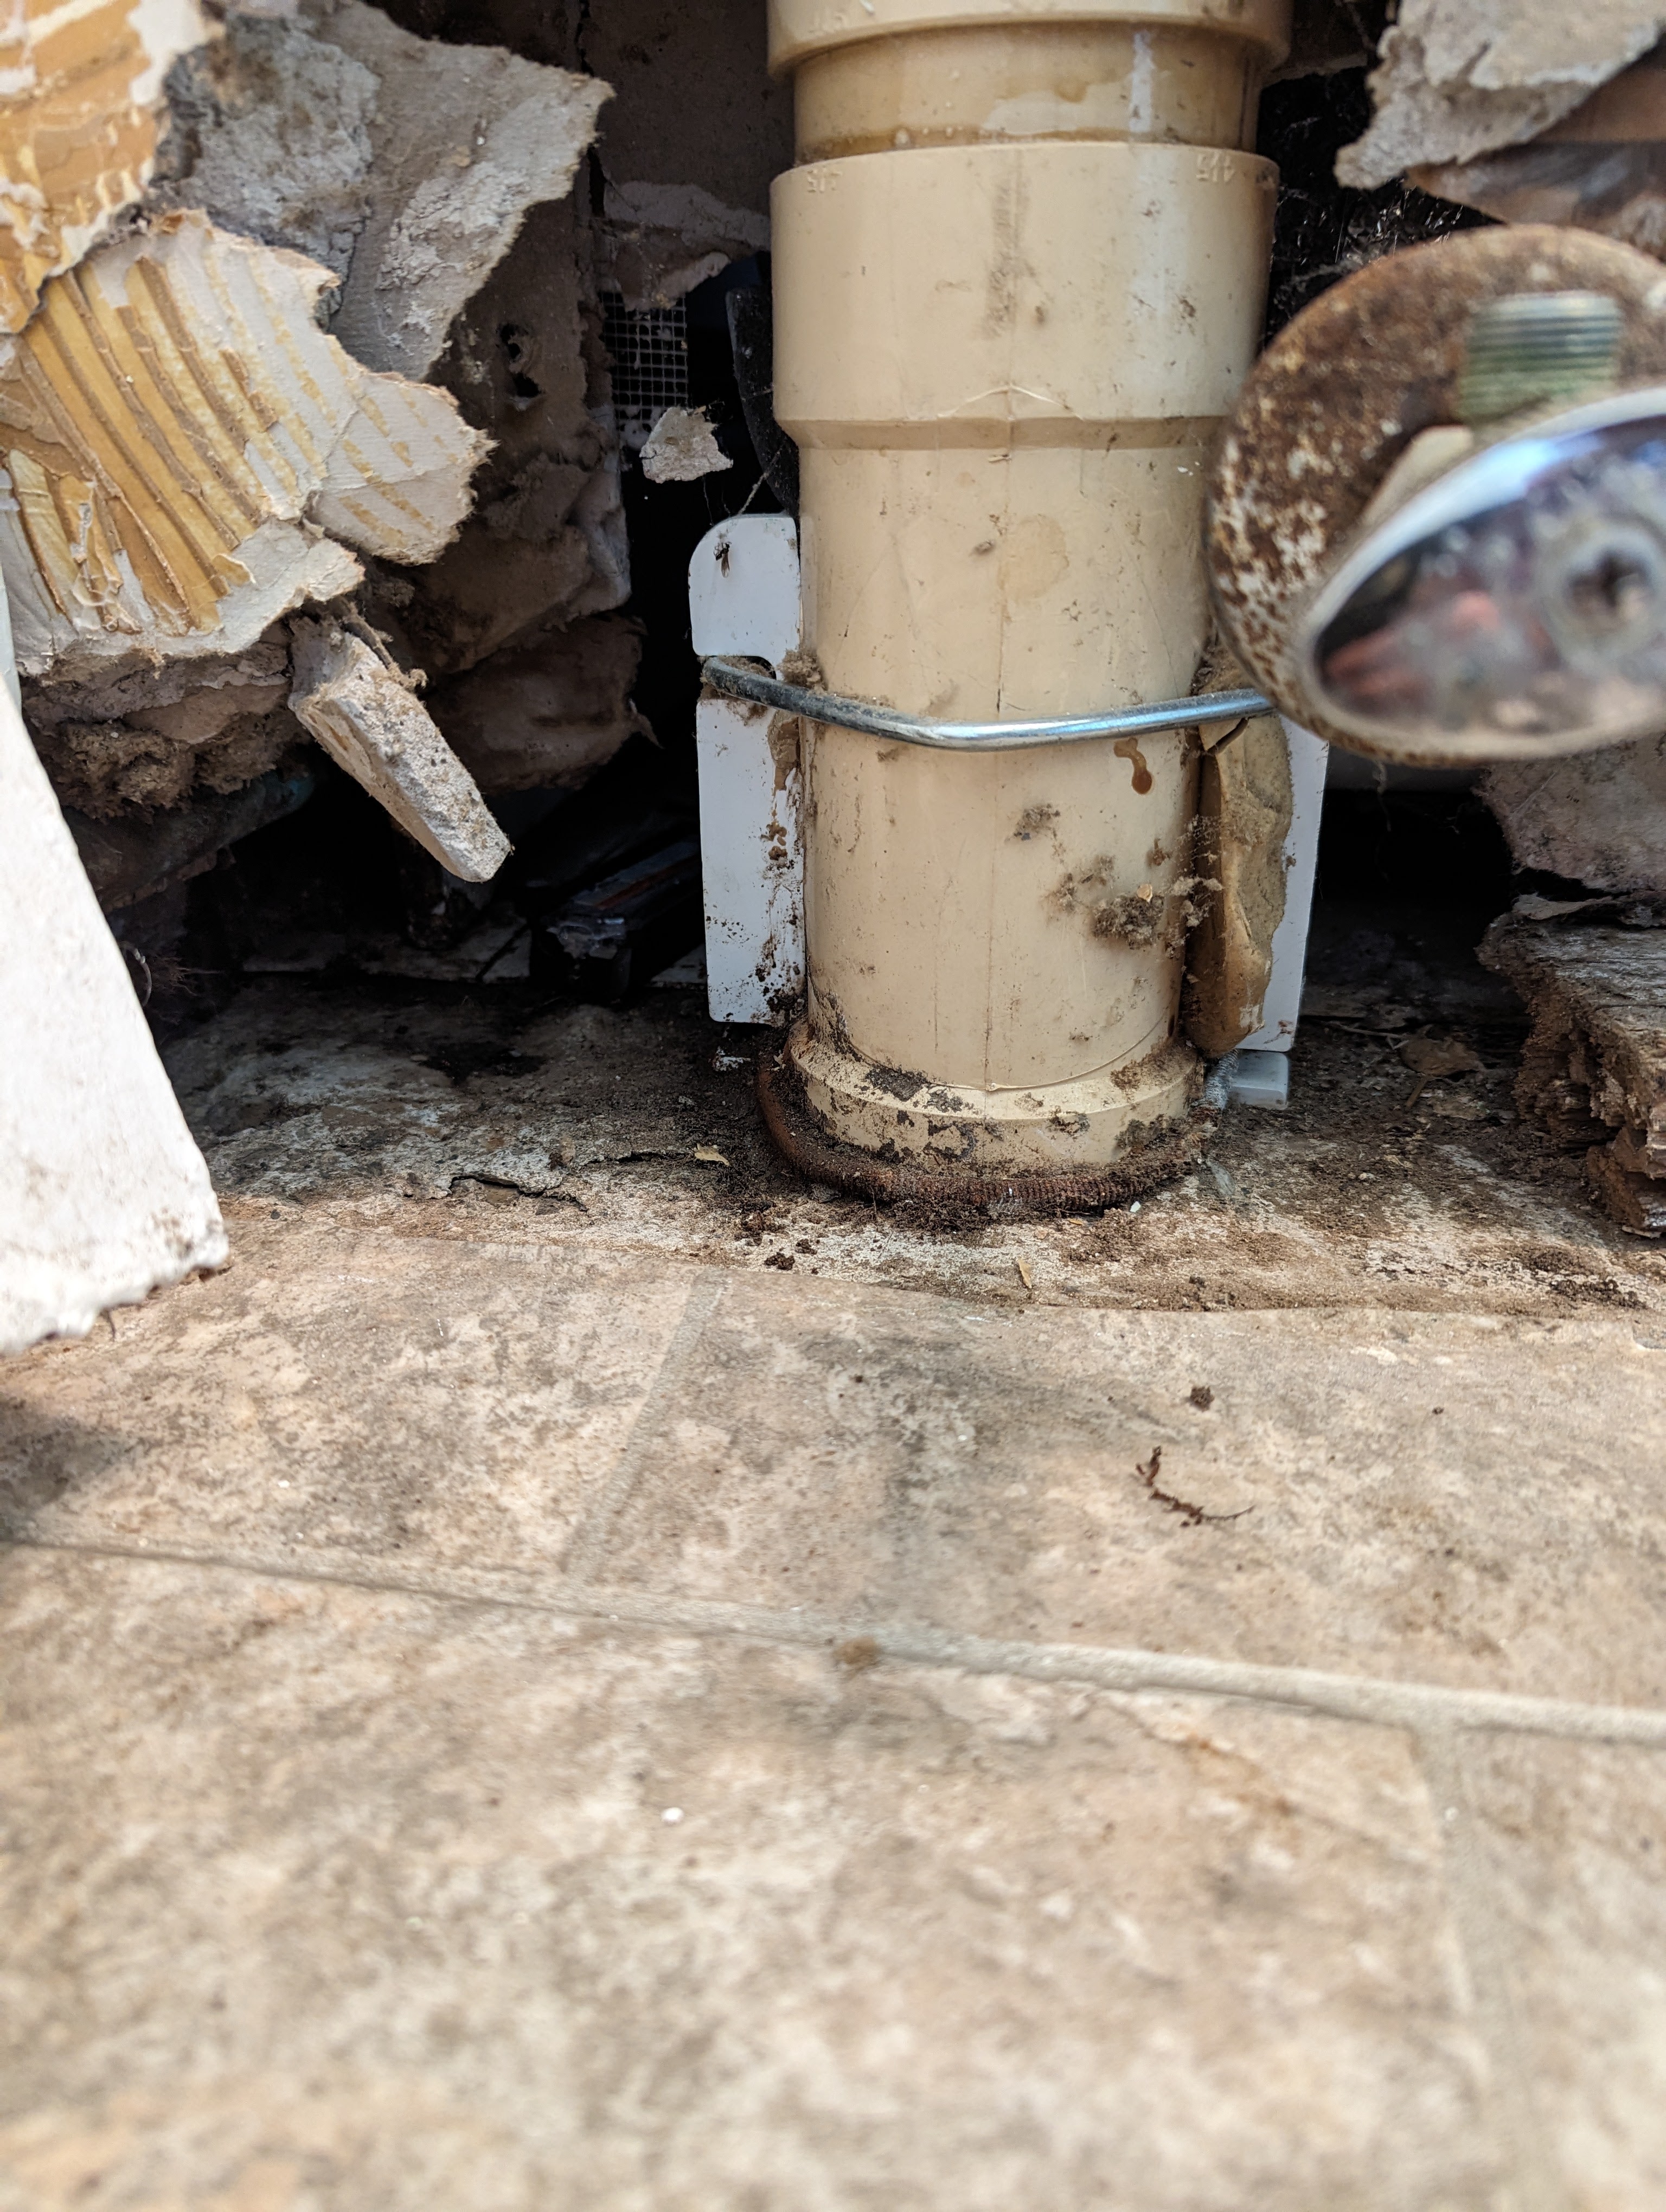
The bathroom originally had paneling on the lower half of the walls. The prior owners cut a hole into the paneling to accommodate the toilet tank’s width. Upon removing the toilet and sink, we discovered that the paneling near the baseboard heater was damaged, revealing a clear view into the adjacent laundry and furnace room. The foundation had crumbled, small roots had invaded, and there was evidence of ants burrowing up from the ground. To make matters worse, this area was right next to the main sewer drain.
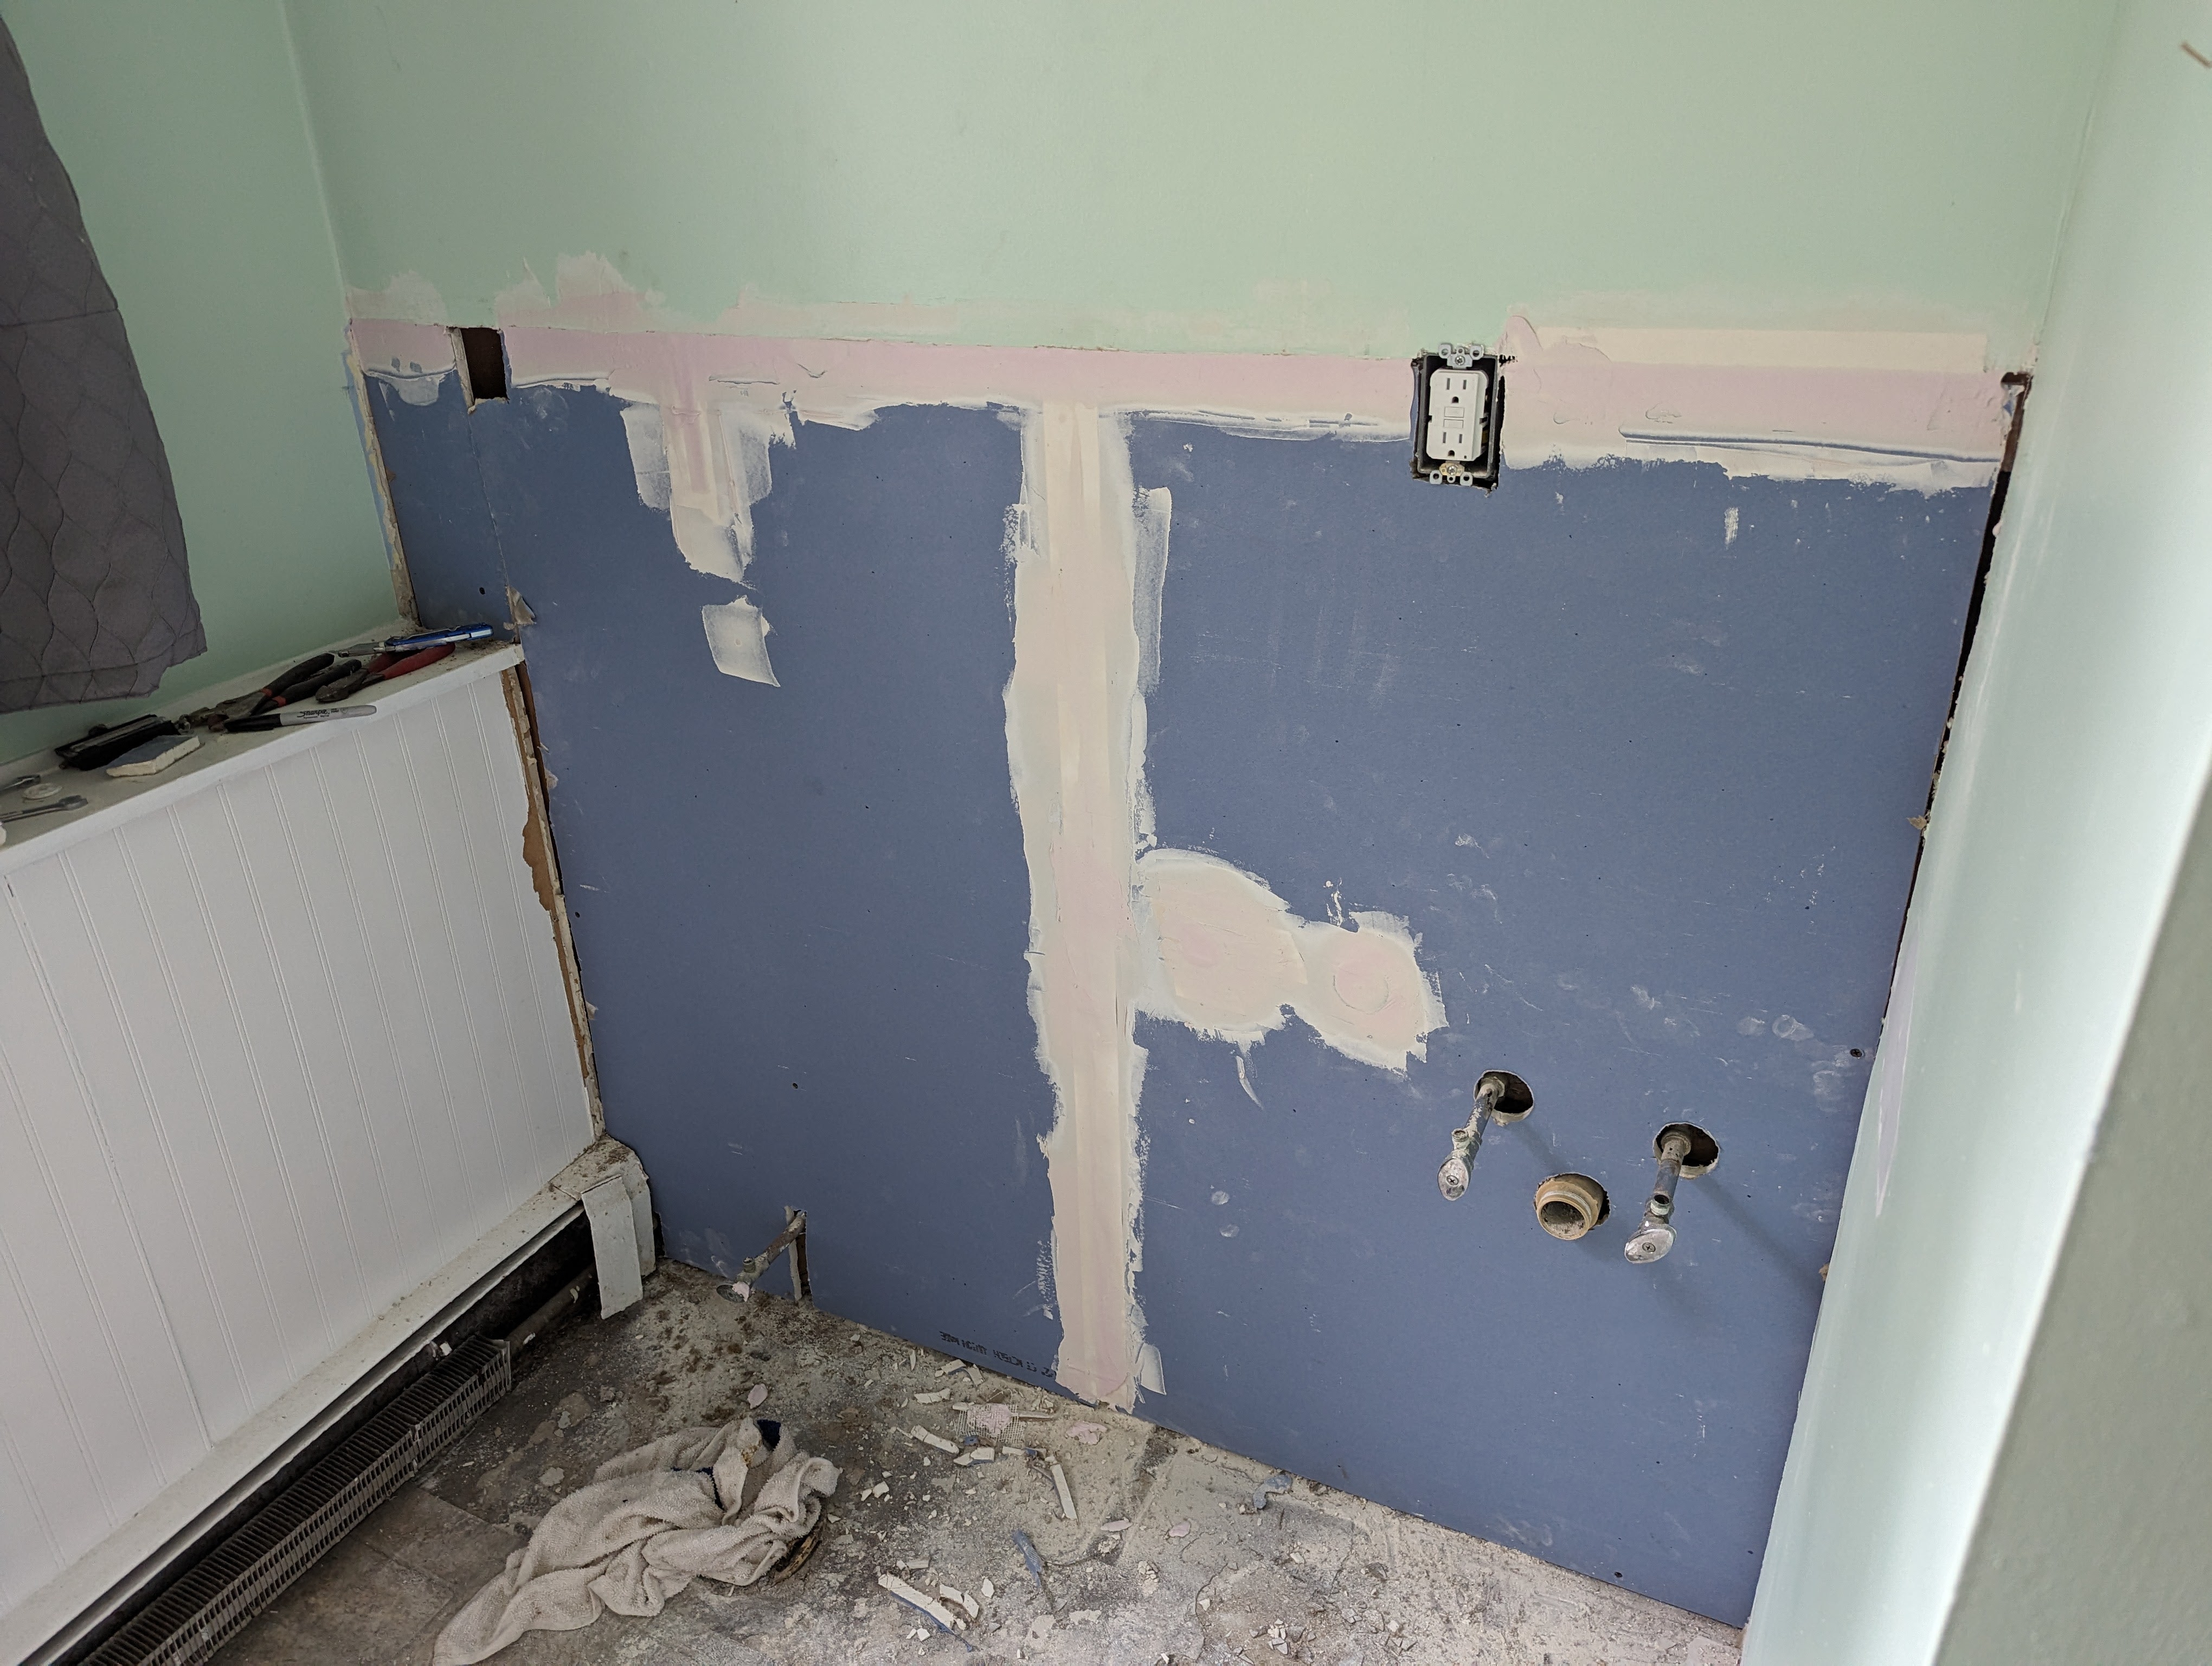
Our first step was to remove the damaged paneling. As we did, we found signs of past water damage. The drywall behind the paneling was covered in thinset and mildew, necessitating the removal and replacement of the lower half of the drywall.
Upon opening up the wall, we discovered more mildew. We cleaned it thoroughly with a vinegar solution. The area near the drain needed additional attention, so we filled the hole with pre-mixed mortar and allowed it to dry. We also found a small, slow leak in the shower’s connection to the main drain, which we fixed with silicone.
Our bathroom project turned out to be far more challenging than anticipated, but we tackled each issue head-on, learning and adapting as we went along.
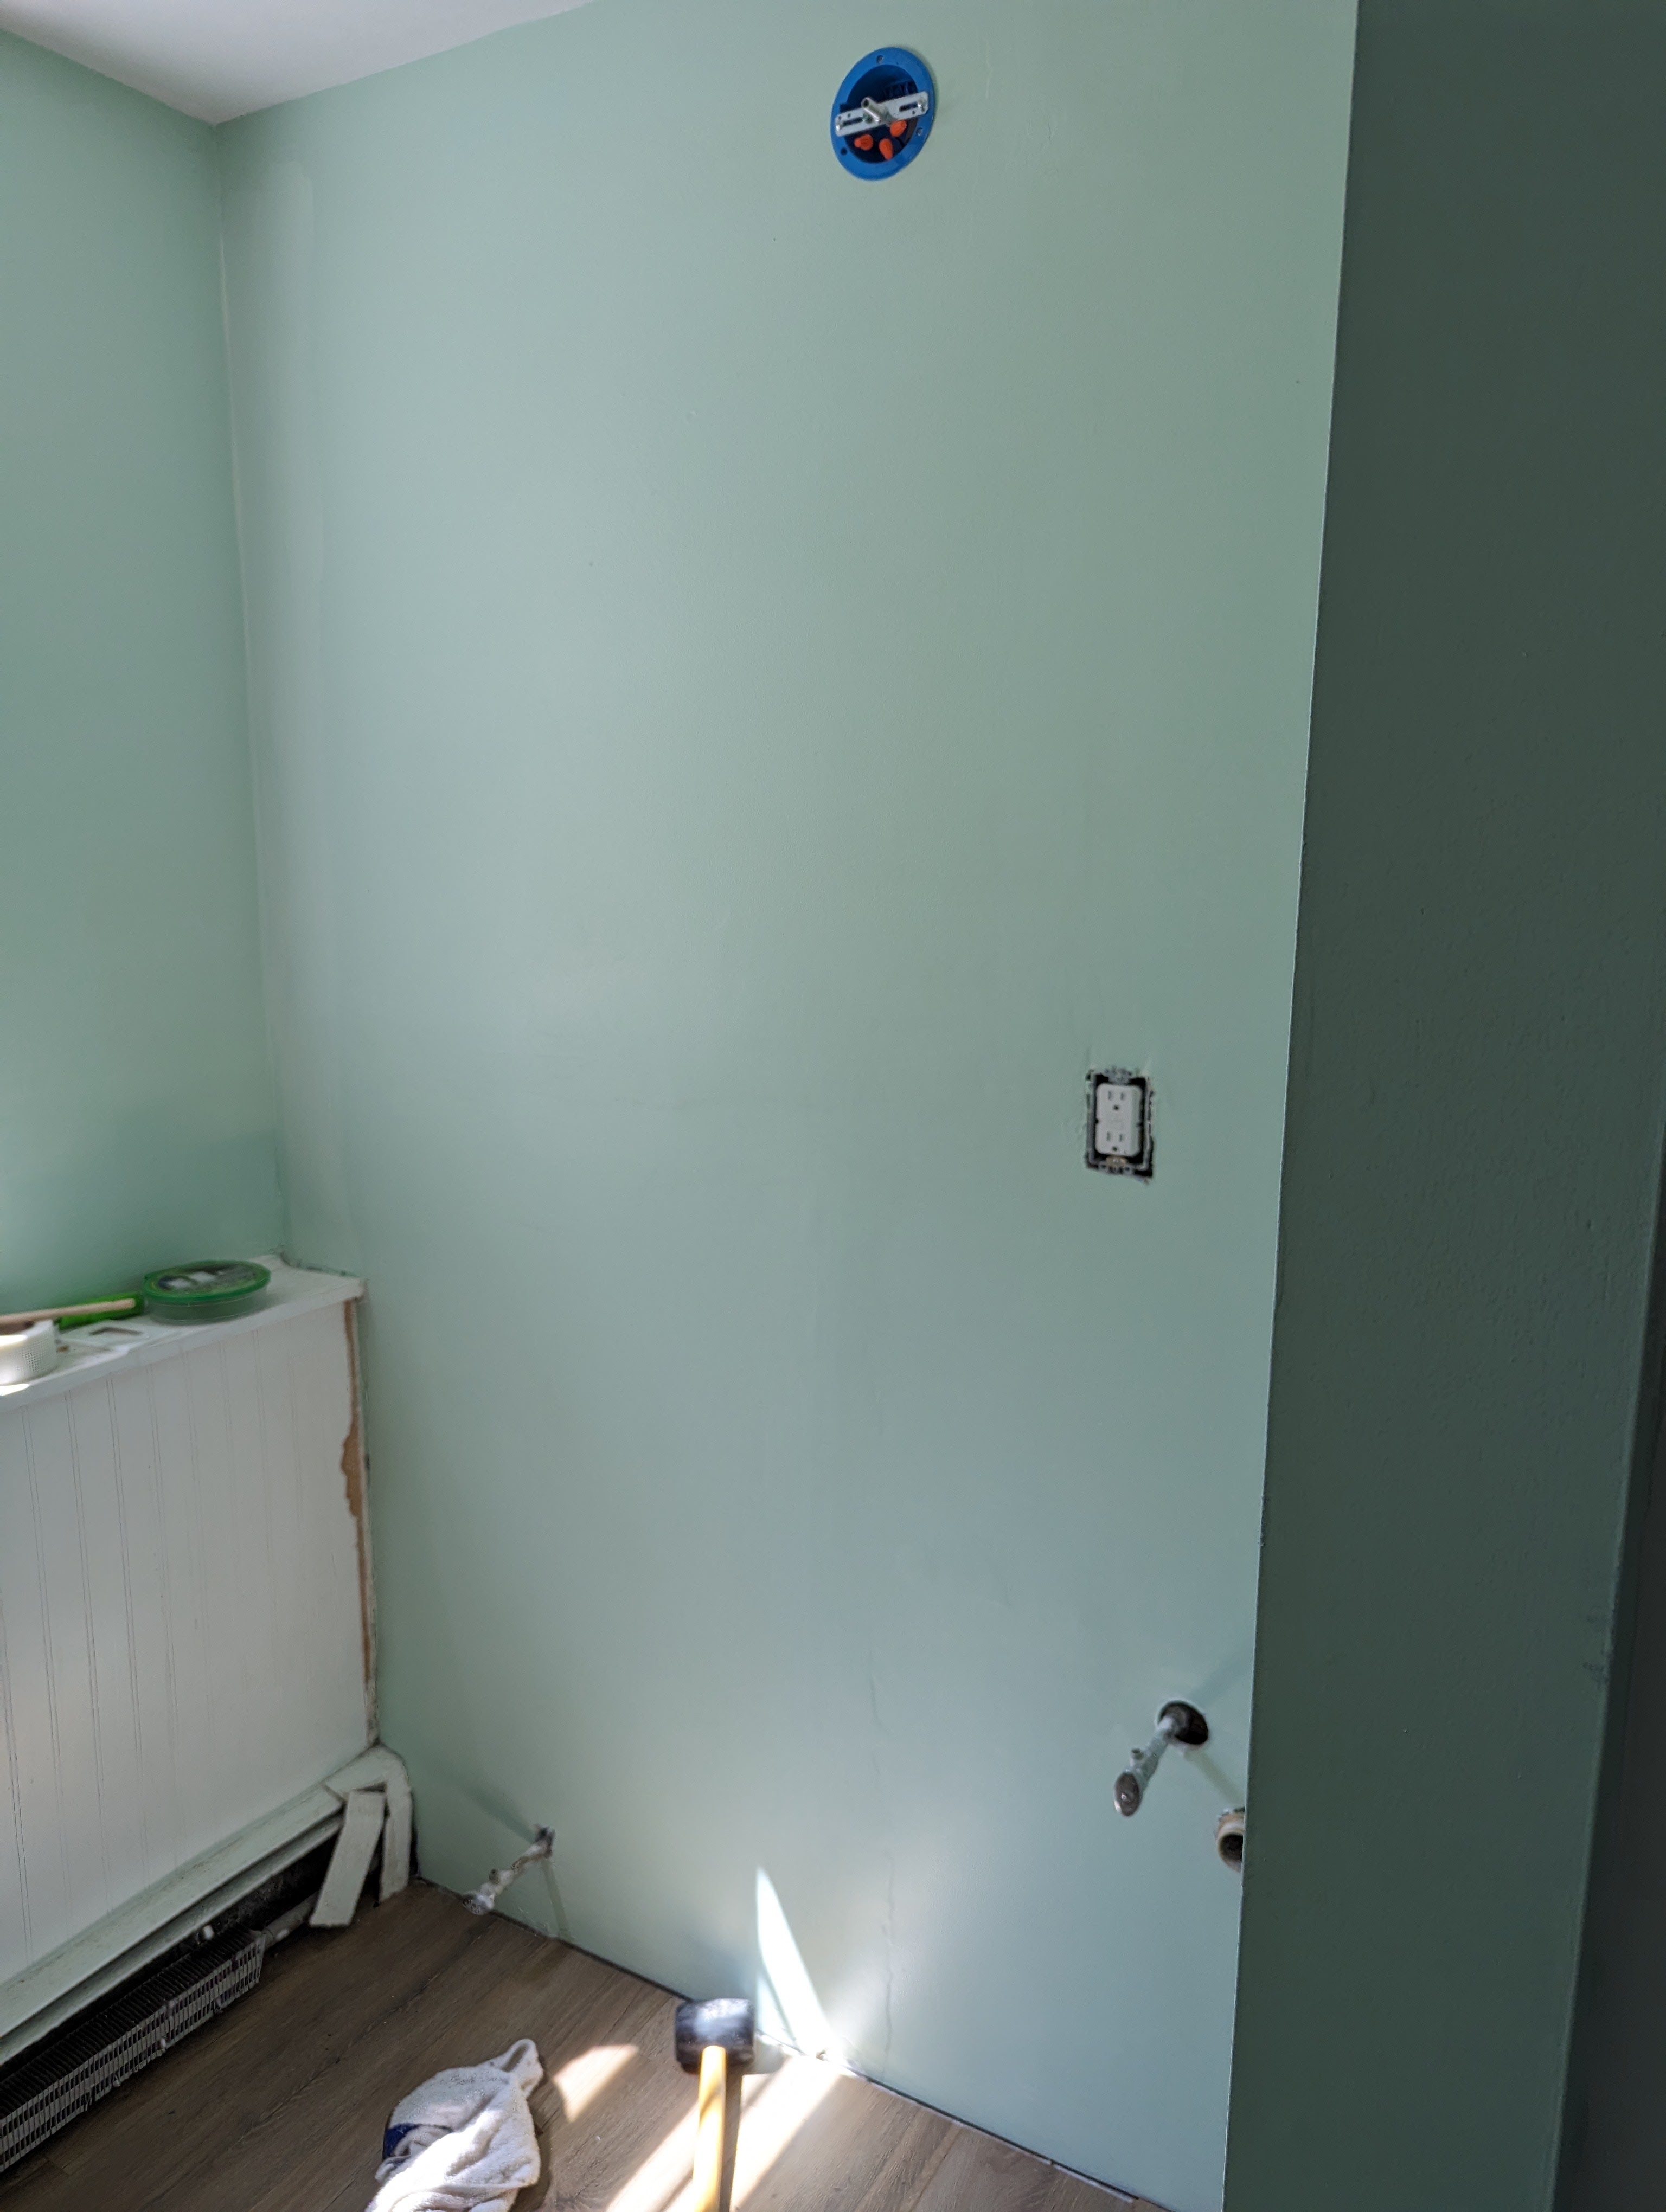
Once the mortar and silicone had cured, we moved on to the next phase: installing the new drywall. While I focused on taping and floating, Chuck got busy with the design details. I measured the space for the new vanity, and we headed out to shop. We lucked out and found a perfectly sized vanity on clearance.
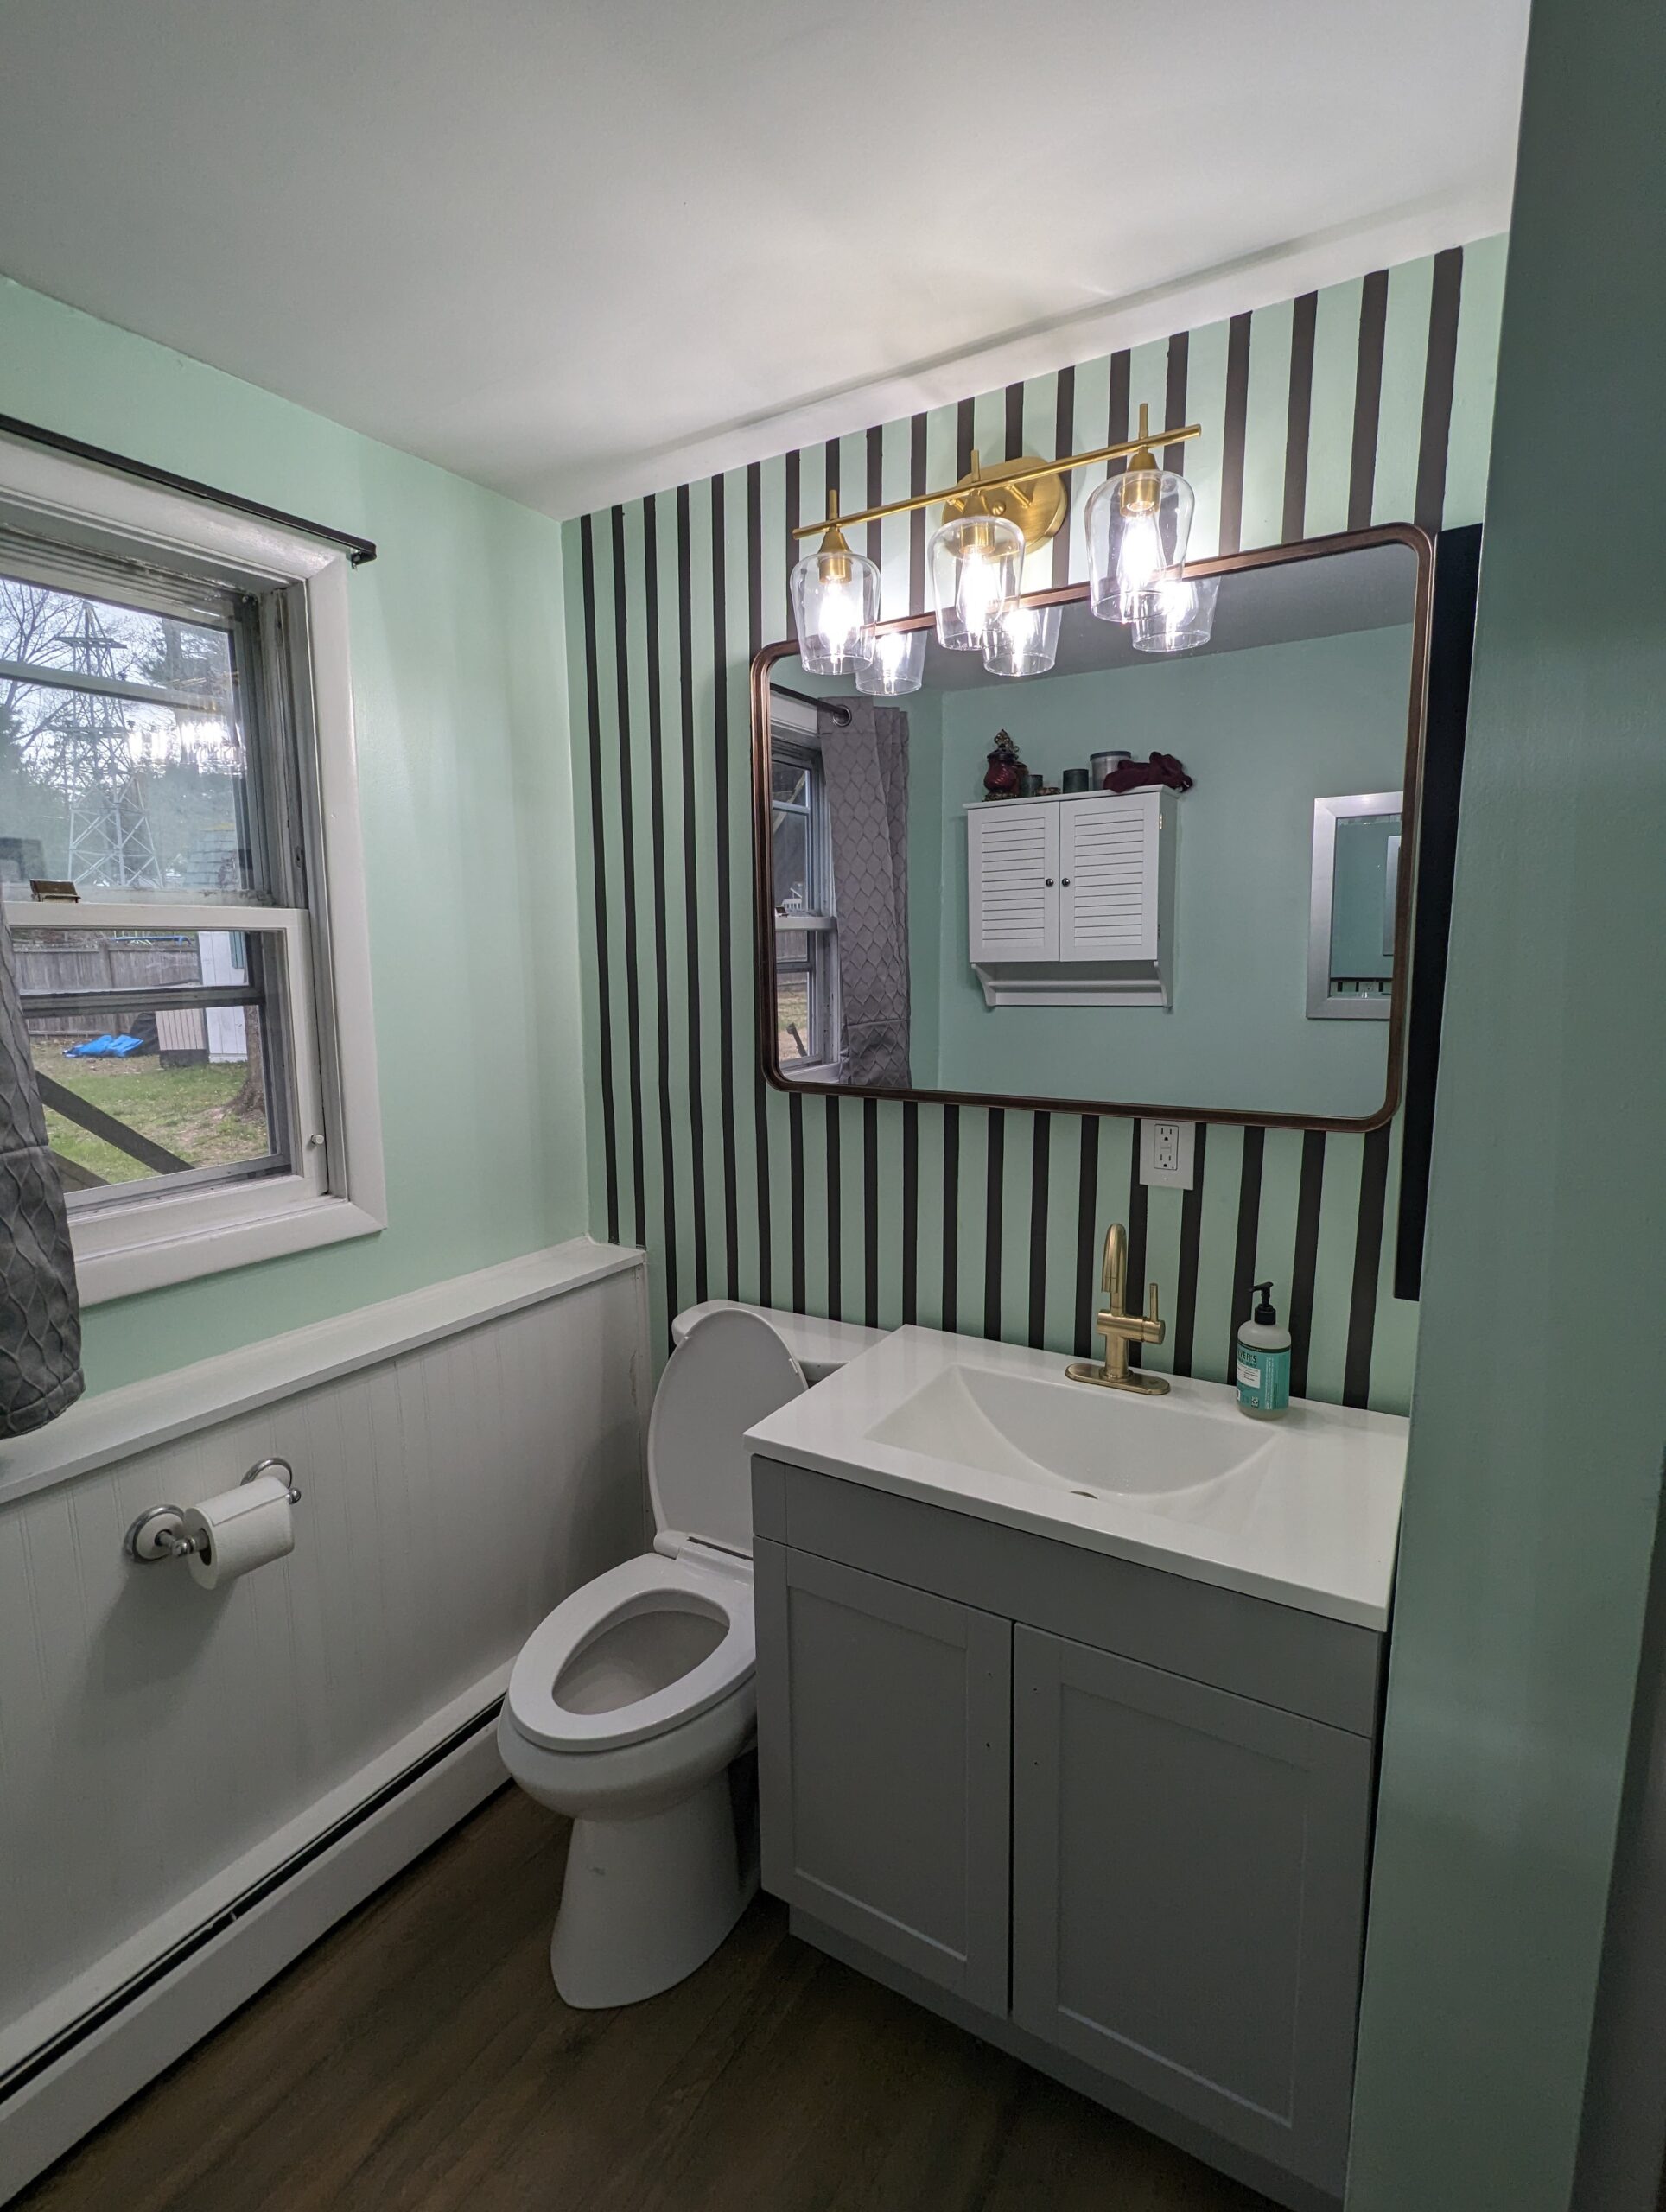
Chuck surprised me with his choice of finishes—he wanted to use brass, adding a touch of elegance to the room. He also had a creative idea: instead of reinstalling paneling, he asked me to paint stripes on the wall. It was a fresh, bold choice that added a unique flair to our bathroom makeover.
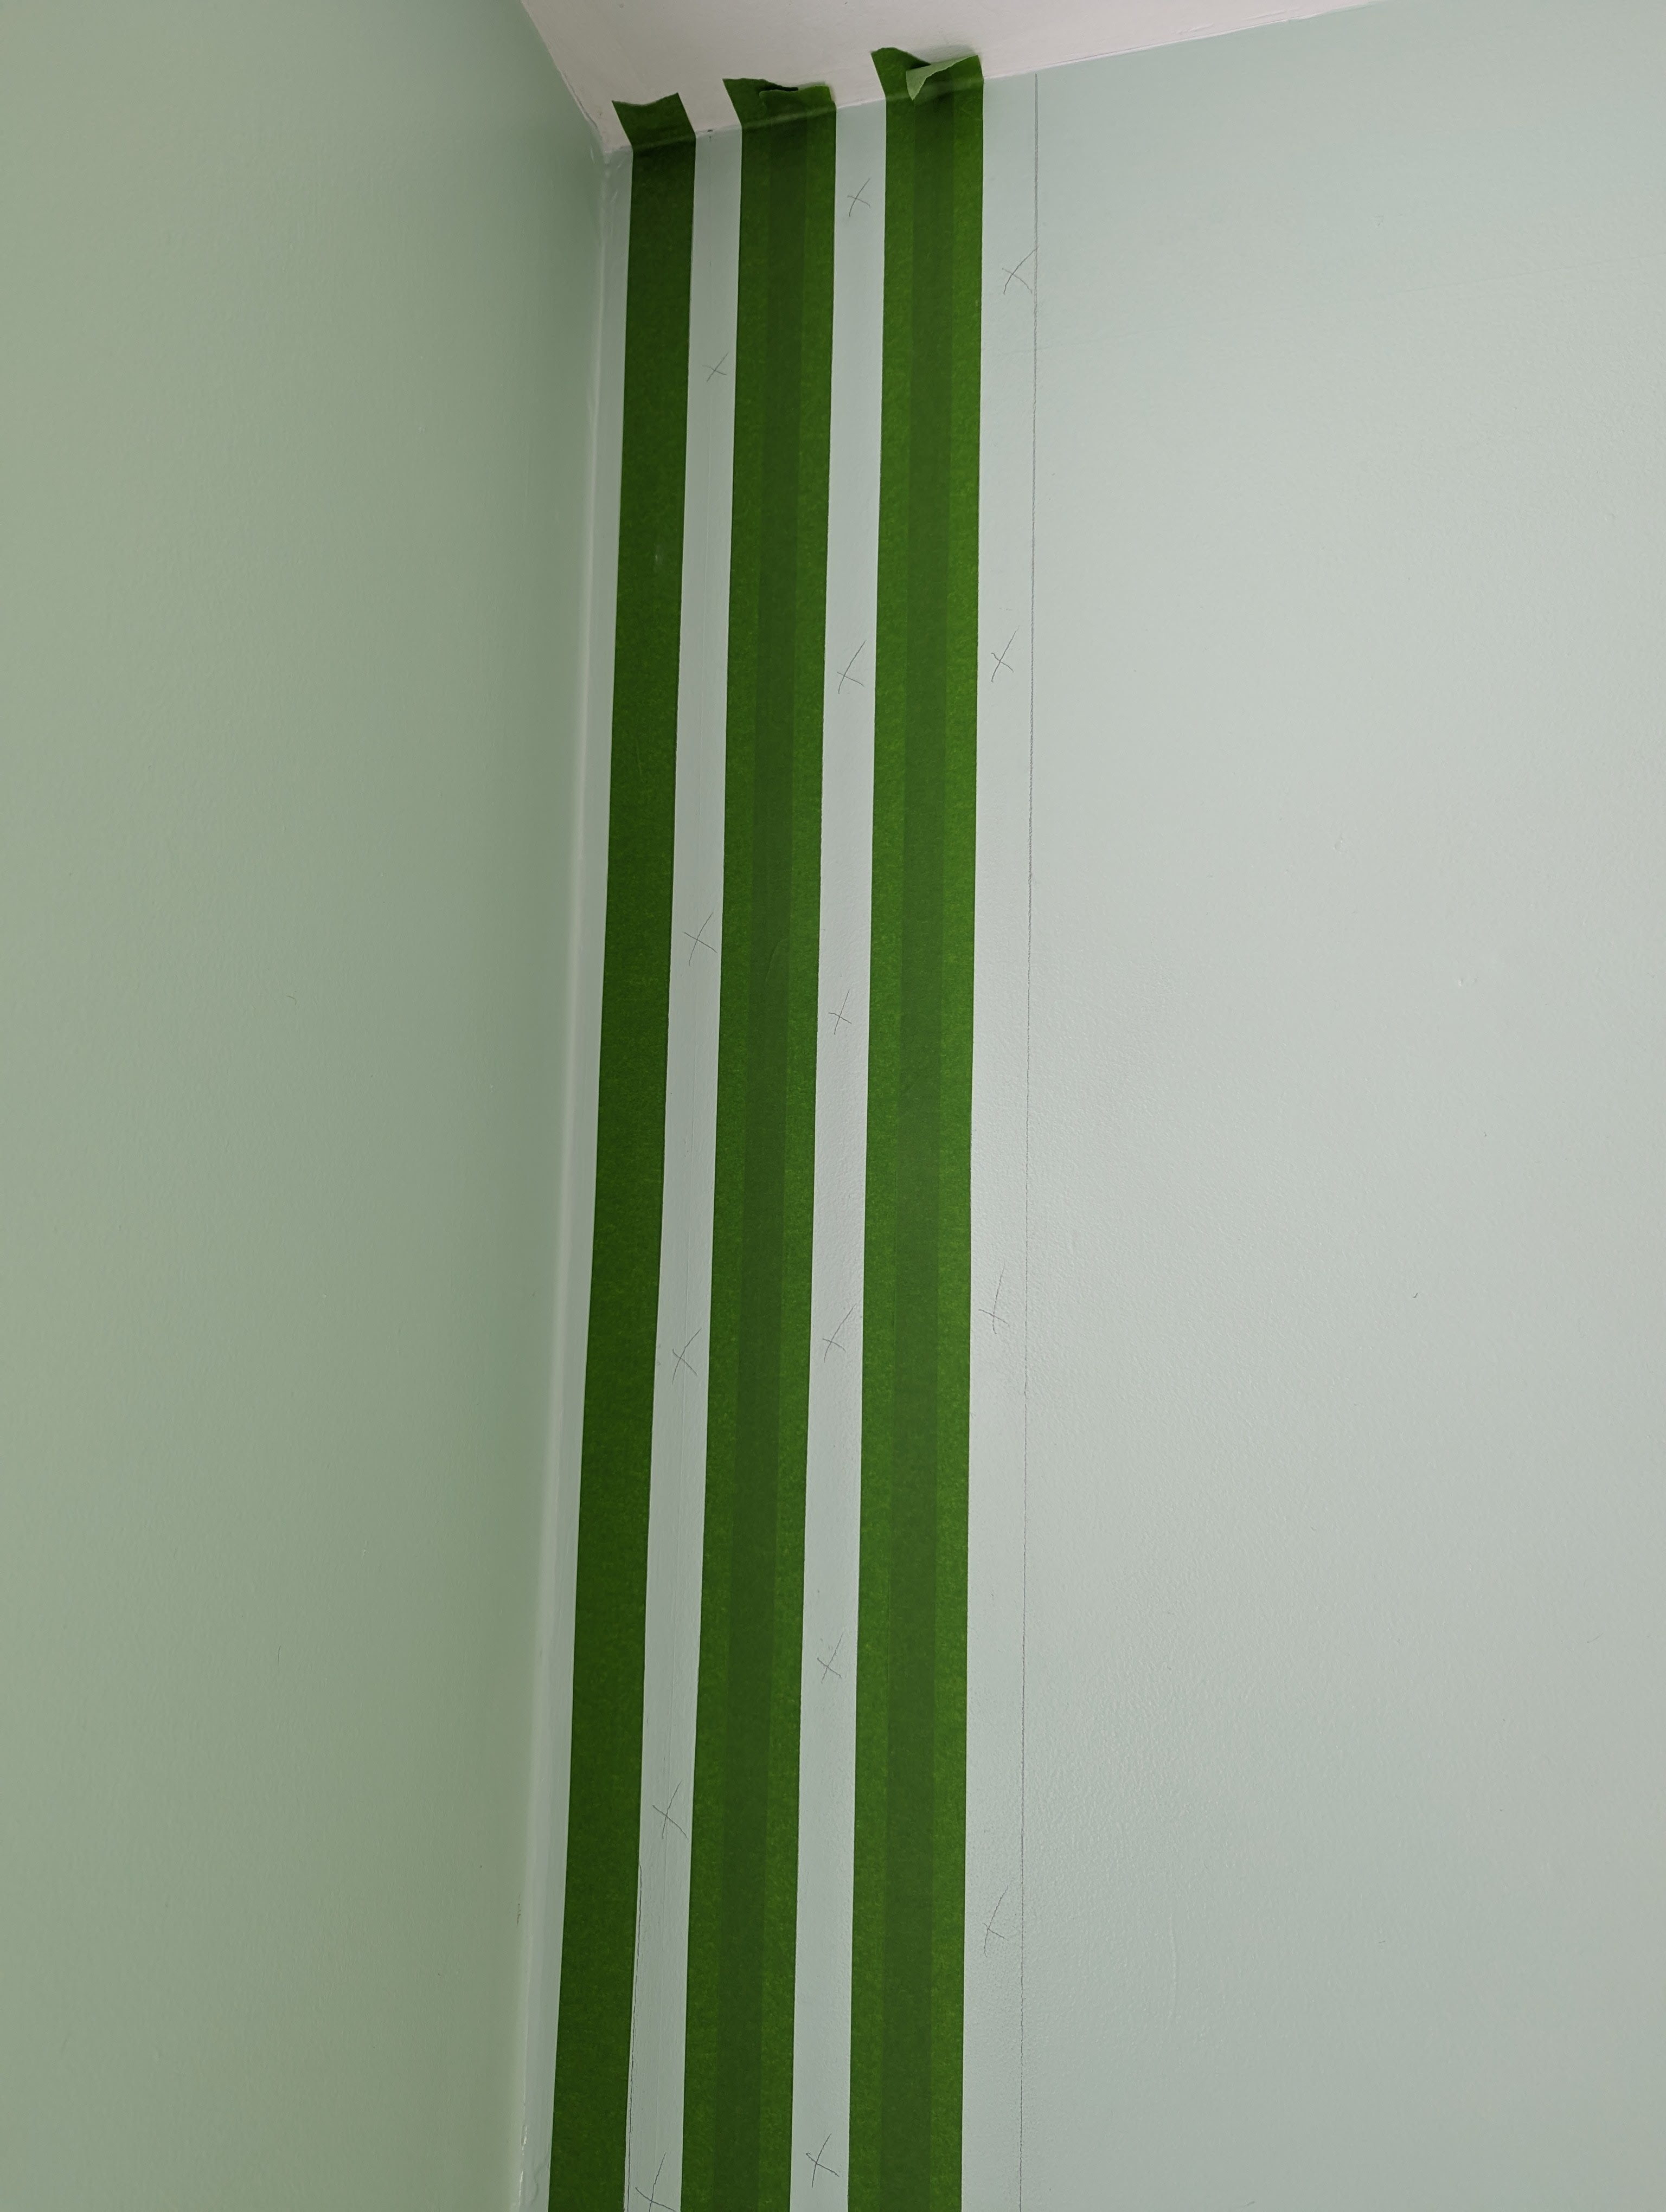
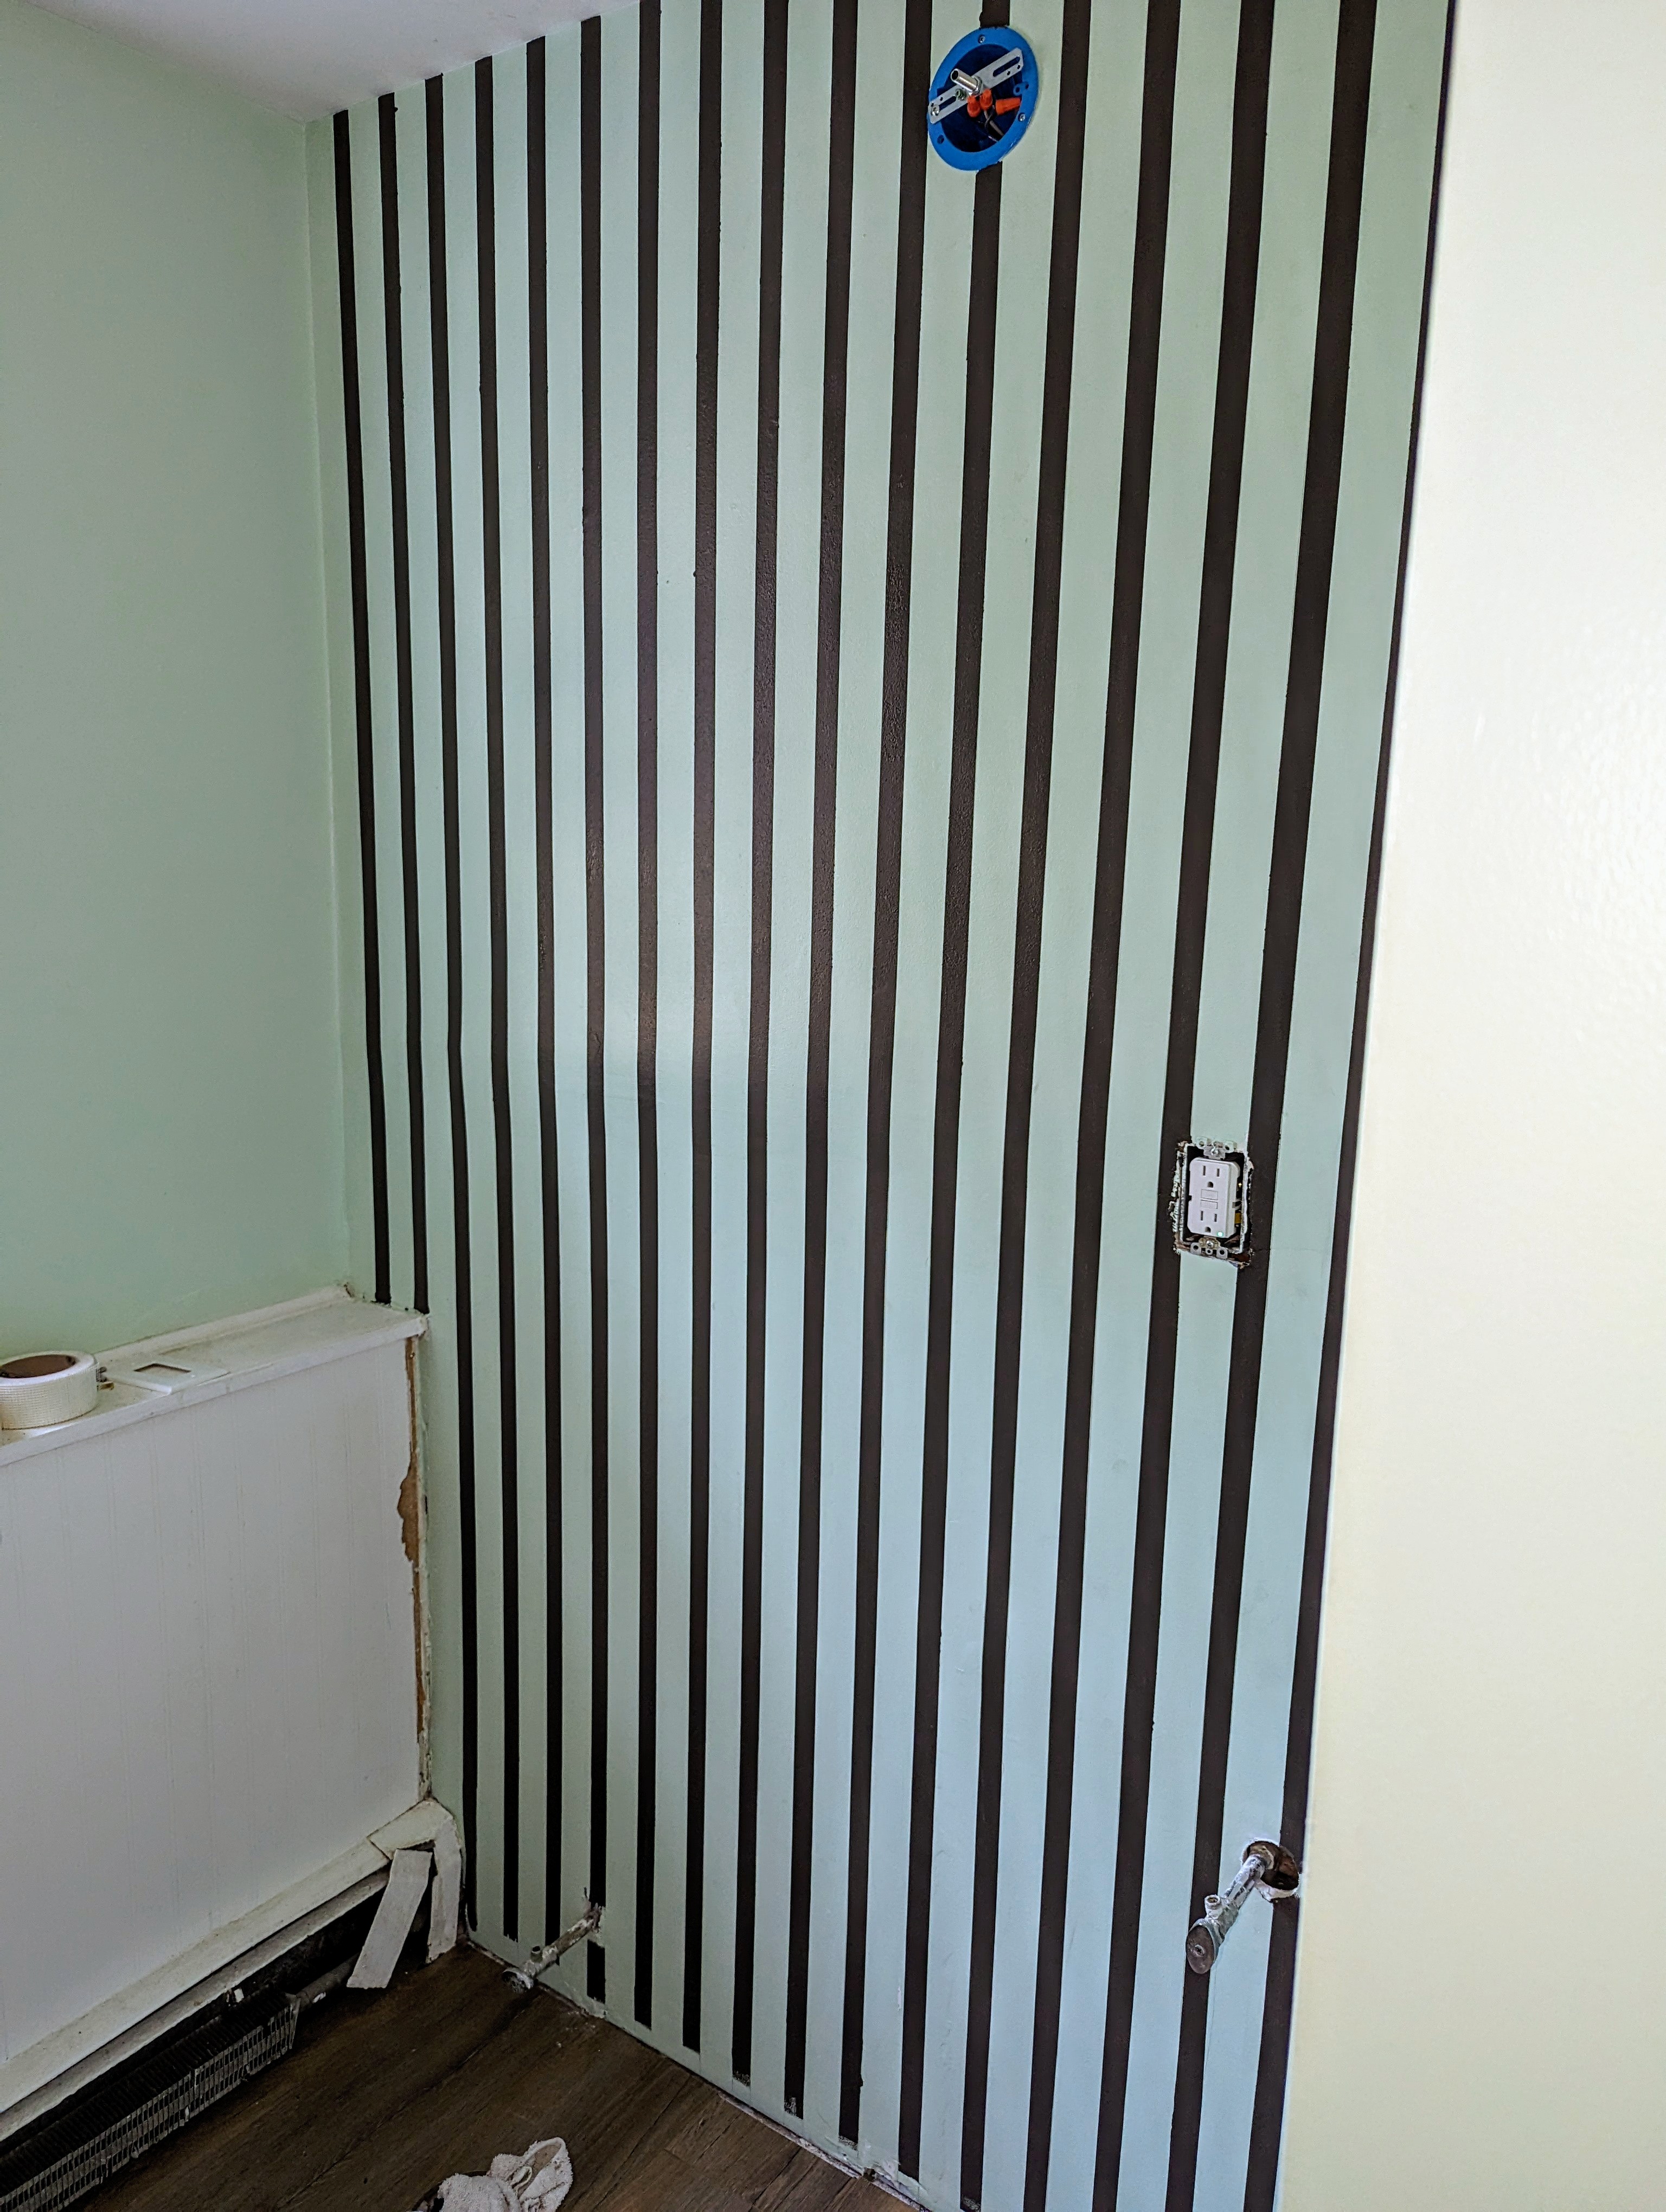
I had never painted stripes on a wall before, so I did some research to find the best method. Despite measuring and using a laser level, the lines kept looking off. I then tried a different approach: cutting two pieces of vinyl flooring, one to 1″ thick and the other to 2″ thick. I used these to draw the lines, taped them, and painted. The main wall color is Mint Condition SW 6743, and the stripes are painted with Urban Bronze SW 7048.
We found a new light fixture that matches the faucet and a mirror. After installing the floors and new baseboards, we put in the vanity and toilet. While both fit, I realized I made a mistake in my measurements—the vanity is too close to the toilet. We should have bought a 24″ vanity, but we bought a 30″ one. For now, we’ll use what we have while we look for the right size.
We’re also on the hunt for the perfect mirror to place above the vanity. Additionally, we have a cabinet we’re working on to replace both the blue and white cabinets. Updating the shower to create more space is another future project on our list. Although the bathroom looks amazing now, we still have some work ahead of us.
Embarking on this basement bathroom makeover journey has been both challenging and rewarding, and we’re excited to share every step with you.